Morrowind - Day One - Seyda Nin. Morrowind Mission Main Story
The game begins after the protagonist is awakened from sleep by a neighbor in the hold named Jiub. This is followed by the process of creating a character: the choice of skills, main and important skills, race, etc. All this action ends in the office Cellus Gravius. He will give the protagonist first task, from which the main plot of Morrowind originates.
You need go to Balmora and find there Kaya Cosades, and then send him a message presented by Sellus. The easiest way to get to Balmora is by silt strider- one of the main ways to travel in the world of Morrowind.
Upon arrival in Balmora, head to northeast Part of city. There you will find Kai's house. Give him the papers and ask for a job. First of all, the master spy will send you to gain experience. Ignore his advice and talk to him second time while not forgetting to ask about the task.
Dwemer puzzle in exchange for information about the Sixth House

Travel to the Dwemer Ruins Arkntand. They are to east from Balmora and northeast of Fort Moonmoth. To get inside, you need turn the lever on the pipe at the entrance.
Entering Arkntand, go down deep into the stone ledges, past the hole in the wall. Having reached the right place, you will become the object of an attack by two bandits. Having emerged victorious from such a dishonest fight, climb the balcony along the stone ledges and enter the room called " Cells of an empty hand". In this room on the shelf to the left of the entrance you will find the desired Dwemer puzzle.
When you get what you need, come back. to the Guild of Fighters to Hasfat Antabolis. Having given him the Dwemer puzzle, be sure to ask about the sixth house, after which Hasfat will give a message to Kai Cosades, which must be taken to the quest giver.
Favor for Sharn gra-Muzgob or search for the skull of Llevul Andrano

You found out about the Sixth House, now Kai Cosades sends you to get information about cult of the Nerevarine, or to be more precise, to the Balmorskaya Mages Guild, to some Sharn gra-Muzgob. Everything will happen according to the old scheme. A favor is required from you in exchange for information. The Mages Guild is located on the western bank of the river dividing the city in half, in the northeastern part of Balmora Square, next to the Fighters Guild.
Sharn gra-Muzgob will ask you to get it for her Llevula Andrano's skull, which you will find in his Ancestral Tomb of the same name. Take a silt strider to Seyda Nin, and from there follow the east road towards Pelagiad. The tomb is in the south from it, and to the west from a small lake. Skull you will find in northern room of the tomb. Having acquired the desired part of the departed Llevul Andrano, return to Balmora and give it to Sharn gra-Muzgob. Again, do not forget to ask about the information you are interested in. Having received notes on the cult of the Nerevarine, return to Caius Cosades with a report.
Further gathering of information about the Nerevarine and the Sixth House
The Blademaster sends a hero on a quest three personalities who, apparently, have similar views on the history of Nerevarine and the Sixth House. All of them are located in Vivec - the capital of Morrowind.

- Mehra Milo. She is a priestess of the Temple and spends all her time in Hall of Wisdom Library. Mehra will tell you that there is an opinion about the falsity of the three gods of the Tribunal. For a detailed acquaintance with this point of view, you need to find a book called Promotion of Truth. The first instance is in the Temple's Secret Library. Go to the Hall of Justice. There, find the Office of the Order of the Watch, the entrance to the Secret Library will be in the floor under the carpet, in the far right corner of this room. There is a similar hatch in the Judicial Offices of the Hall of Wisdom. You will find the book on the shelf closest to the entrance from the Judicial Office. Another copy Jobasha has. His shop is located in the Outlander Quarter, on the Lower Belt, on the western side of it.
- Huleya. you will find it in the tavern Black Shulk located in the Lower Belt of the Foreign Quarter. In exchange for information, he will ask you to accompany him to his friend at the Jobashi Bookshop. However, not all so simple. Huleya is waiting in the tavern two, he said, are racist. If you don't want more trouble, just bribe them. Otherwise, you will be forced to break through to the bookstore with a fight. After seeing the Argonian to the right place, the store, if you forgot, is located on the same belt, on the opposite side from the inn, ask Huleya about the Nerevarine cult, and get a note from him with the information you are interested in.
- Addhiranirr. You can find her in the dungeons of the District of St. Olmes, or to be more precise, in their northeastern part. What is she doing there? It's simple - hiding from the tax collector, and in order for Addhiranirr to help you, you need to somehow get this tax collector to get away. The picker's name is Duvianus Platorius. He walks in a dress and an expensive shirt around the Belt of St. Olms, two floors above the dungeons where Addhiranirr hides. We speak with the annoying agent and send him on the wrong track hiding Argonian. Allegedly, she took a gondola to the mainland and was like that. After all that has been done, we return to Addhiranirr. As a reward for your help, she will share with you information about the Cult of the Sixth House (the main thing is not to forget to select the desired line in the dialogue).
Ready. Gathering all the necessary information return to Caius Cosades with a report.
Gift for Ashlander Hassuru
It's time to take a deeper look into everything that happens in the province of Morrowind. And who else but its indigenous inhabitants Ashlanders have accurate knowledge of the affairs of the days of the past. Therefore, you need to ask one of them. The master spy will send you to Hassuru Zainsubani in Aldrun.
You will find Hassur in the tavern Ald Scar, which is located in the northwestern part of the city. In order for Ashlander, who left his tribe, to tell you about the cult, you need to present him with some kind of gift poetry book or just increase his confidence in the hero (bribery, persuasion). After the manipulations, Hassuru will share the information you are interested in about the Ashlanders, and you can return to Kai Cosades with a clear conscience.
Beginning of the Trials from the Legend of the Nerevarine
What a twist. It turns out that the Emperor himself believes in the prophecy of the Nerevarine. Moreover, he believes that Nerevarine may be it's the main character. To clarify all the circumstances, Kai Cosades sends the protagonist to Camp Urshilaku, so that he met with the heads of the Cult of the Nerevarine, who should test him and find out if the Emperor's hopes are true.
The spells "Mark", "Return" and "Levitation" will make your life much easier when completing these quests.
Camp Urshilaku is located on northwest of the island. Travel to Huul and move northeast along the coast past the ruins of Daedra Assurnabitashpi. Soon you will see the Ashlander camp - this is the Urshilaku Camp.
Invite one of the local natives towards you and say that you have fulfilled part of the prophecies about the Nerevarine. After that you will be sent to Zabamundu. His yurt is on southwest camp. When talking with Zabamunda, say that you have found out about the Sixth House and the Cult of the Nerevarine, after which you will receive permission to speak with the Heads of the Nerevarine Cult you need: Sul-Matuulom and Nibani Mesa.
Trust Urshilac - Rite of Initiation

The first step is to meet with matuulom. His yurt is located next door, to the right of Zabamund's yurt. The head of the Urshilaku tribe will offer undergo the Rite of Initiation. It is included in Finding Luca Bone Gnawer, which can be found in Burial Caves of Urshilaku. The caves are located on southeast of camp Urshilaku and in the northeast of the Falasmarion fortress.
The bow you need is located in the Burial Caverns of Urshilaku branch called " Great burial”, in its southeastern part on the body of a ghost. Having received the desired item, return to Sul-Matuul. After passing the rite of initiation, the head of the Urshilaku tribe will call the hero a friend of the Clan and will allow you to ask the right questions Nibani Mesa- shamans of the tribe. Her yurt is located in the north of the Camp.
The shaman will tell you a lot of interesting things about the prophecy and about the seven trials, also called " seven visions". So much information has fallen that it's time to share it with Spymaster Kai. Return to Balmora and report to him what you have learned.
Attack on the Base of the Sixth House - Infection with Corprus
While Kai ponders what he heard, you need to defeat base of the sixth house, which is located in Ilunibi cave. For details, the Master Spy will send you to Fort Motley Butterfly To Raese Pullie. The fort is located south of Aldrun. In general, Raesa will not share any useful information with you. The only thing you will hear sensible is the advice to ask the residents Gnaar Moka about the base of the Sixth House, which you should do.

Gnaar Mok is located in the western part of the island. Take a silt strider from Aldrun to Hoool and from there by boat to Gnaar Mok. From the words of the locals, you will learn that Ilunia, the Base of the Sixth House, is located on northern tip of the island. You will find the entrance to the cave on a hill called " Cliff Hartag". It's time to pay a visit to your mysterious enemies. Move northwest from Gnaar Mok along the wooden scaffolding and soon you will stumble upon the entrance to the cave you need.
Your aim Dagoth Gares. It is located in the northern part of the Ilunibi branch called " Soul Rattle". After entering the caves, move south past the first corridor, and then keep to the left all the time. Soon you will see the entrance to the "Black Heart" branch, through which you will fall into the Soul Rattle.
Dagoth Gares will try to lure the hero to the side of the Sixth House. Of course, it would be great to try yourself as an antagonist, but this branch is not implemented in the game. After talking with Gares, you will be attacked by him, and after defeating him, you will receive Curse of Corprus. The worst thing is that there is no cure for this disease, but do not despair, maybe Kai Cosades knows what to do in this situation. After completing the assignment, return to the Blademaster.
The Cure of Corprus - The Second Trial of the Reborn Nerevarine

Kai Cosades suggests searching ways to cure corprus at Divaita Fira. You can find it in Tel Fire, a fortress located southwest of Sadrith Mora. The easiest way is to use the services of the Guild of Mages and teleport to Sadrith Mora, and then, using the Water Walking potion or the corresponding spell, get to Tel Fir.
Divayth Fir is located in his chambers on the upper levels of the tower. Necessary levitate to him through a hole in the ceiling. Before trying to cure the disease, Divayt will offer you to proceed to the corprusarium and see for yourself what the so-called divine infection leads to, and at the same time pick up a pair of boots at Yagrum Bagarn. By the way, Yagrum is the last of the Dwemer who have gone into oblivion. You will find this unfortunate in Bowels of the Corprusarium, v northeastern its parts. Once you've obtained the Dwemer Boots you need, return to Divayth Fir.
Before giving you the cure, Divayt will say something about side effects in the form of character death. Oh yes, and God bless him, there is no choice. And lo and behold, after the hero takes the medicine, the disease will recede. It's time report Caius Cosades about it.
Visit to the Ministry of Truth - the search for Mehra Milo
After receiving the news, Kai will upgrade the hero to Agent and appointed head of the Blades in Vvardenfell. Also the Master Spy will give his last assignment. You must go to the Halls of Wisdom located in the Temple of Vivek and meet Mehra Milo there. You won't find it in the library. Therefore it should look for Mehra in her apartment, which are located right there in the Halls of Wisdom.
Apparently something went wrong. She is not in Mehra Milo's chambers either.. However, on the chest of drawers to the left of the entrance is a note addressed to "Amaya". Remembering what the Master Spy said, we conclude that Mehra Milo is in trouble. The only place they could lock up the poor thing Ministry of Truth. Before you go to rescue the prisoner, take two scrolls with you Divine Intervention.

Ministry of Truth is a floating fortress right above the temple. Therefore, except with the help of levitation, there is no way to get there. Having collected the things necessary for salvation, go to the rescue of Mehra Milo. Levitating into the Ministry, Talk with Alveloy Saram at the lower entrance to the Processing Hall. Tell her you have an appointment. After that, a cooperative resident will share with you the key to the doors of the Ministry of Truth. Also, if your character has the appropriate skills, you can simply open the door with a master key or a spell.
Once inside you become an object Ordinator attacks. You can finally avenge their rants like "We're watching you little one." Having dealt with the offenders, go to prison of the Ministry of Truth. Mehra is located in south chamber. Share the Scroll of Divine Intervention with her, after which she will make an appointment for you at Monastery of the Apostate Priests, which is located on Holamayane. That's where you should go.
Temple of the Apostate Priests Holamayan

Holamayan is located south of Sadrit Mora and on northeast from the Dwemer ruins Nchurdami. Temple opens magic shield only at dusk and dawn. After waiting for the right time of day, go inside. Mehra Milo will be waiting for you at east side of the temple. She will advise you to talk about the prophecies with the abbot of the temple of the Priests of the Apostates - Gilvas Barelo, fortunately he is standing nearby. He will share with the hero By a lost prophecy, to be delivered to Camp Urshilaku Nibani Mese.
After giving the prophecies, talk to Nibani Mese again and you will hear her verdict that the hero can indeed be the Nerevarine. However, five trials still lie ahead.
Proof of Immunity from Corprus
To prove your resistance to Corprus, refer to Sul Matuulu- the leader of the tribe Urshilaku. He will send the protagonist to Kogorun and asks to bring three things from there:
- Body tears.
- Chalice with the mark of the House of Dagoth.
- Shadow Shield.
Fortress Kogorun located northeast of Maar Gan and on southeast of Camp Urshilaku.

- Tears of Corprus you can get with Hunter Corps either with Corprus cripples, which abound in Kohornuy. In general, whatever you find will do. This part of the test shouldn't be a problem.
- Shadow Shield you will find in the northwestern part of the Kogorun location, called bleeding heart.
- Chalice of the House of Dagoth is in Cathedral of the Women of Pollock, in the southeastern part of the Kogorun Fortress.
Once you've found everything Sul-Matuul asked for, head back to Camp Urshilaku. Showing the Chalice, Shield and Tears of Corprus, the hero will convince the Ashlanders of his ability to resist a terrible infection.
Passage of the third test - Search for the ring "Moon and Star"

The third test will be the search Azura's rings called "Moon and Star", which is located in the cave of the Incarnation. She is located on northeast slope of the Red Mountain, west of Tel Vos. The door to the Cave of the Incarnation opens only at dawn when Azura's Star shines. What, in fact, you will learn by trying to open it at any other time. After entering the cave, take the Moon-and-Star ring from the hands of Azura's statue and you will see a vision of the rest of the trials ahead of you.
After all that's been done return to Camp Urshilaku to Nibani Mesa and tell her what happened.
Trial Four - Mentor of the Great Houses of Vvardenfell
The fourth test on the path of the Nerevarine will be union of the four great houses Vvardenfell. Well, the task is not easy, but stopping halfway is somehow not heroic.
Master of the Great House Hlaalu
Councilors of House Hlaalu located in Balmora, in the western part of the city. Talk with Nileno Dorvayn. She will refuse to help you directly, however, she will advise you to contact Crassius Curio, who lives in Vivec. That is where your path lies.

- Crassius Curio. He is in the location Vivec, Hlaalu Settlement, Plaza: Curio Estate. Crassius Curio will agree to support your candidacy if you give him 1000 drakes. He will also share useful information about the sequence in which to earn the trust of advisors.
- Drum Bero. You will find it in the location Vivec, St. Olmes County, Plaza, Haunted House. Apparently he does not really like to be in sight and specially settled in such a place that scares people away. He will support the hero simply because he found it.
- Yngling Half Troll. Lives in location Vivec, St. Olmes' District, Yngling Manor. He will support you if you give him 2000 drakes. Well, or you can just kill him, you decide.
- Orvas Dren. You will find it on Dren Plantations, west of Pelagiad and northeast of Vivec. Here you need to be careful. To get started, win over Dren by bribery or persuasion. Then ask to be supported as the House Hlaalu Guide. To his question, why on earth should he give you this vote, select the topic: "Tell your story." Orvas Dren will not appreciate your attempts and will refuse. After that, talk to him about Hlaalu's Mentorship a second time. As a result, an additional answer option will appear: “In order to unite the people and Expel the Empire". Select her. Now Dren will agree to support you, and also undertakes that his friends Welanda Omani and Nivene Ulis will also give you their votes.
- Nivena Ulis. She lives to the west of Suran. Take the road north of the city, then turn west and walk across the bridge. Soon you will see her estate. If you have achieved consent of Orvas Dren, then Nivena Ulis will agree to give you her vote.
- Welanda Omani. You will find her estate on an island east of Vivec, Telvanni Settlement. Same situation with her voice. convinced Orvas Dren, agree and Omani.
Enlisting the support all Councilors of the House of Hlaalu, go to Crassius Curio(Vivec, Hlaalu Settlement, Plaza, Curio Manor). He will appoint you as Master of the House of Hlaalu.
Master of the Great House Redoran
You will find House Redoran Councilors in Aldrun. They camped under a large scrub in the Manor District, the northern part of the city. You should start with Athina Sarethi, as others will simply refuse to help you.

- Sergio Athin Sareti. You will find it in western part of the Manor District Aldrun. To get his support, you need rescue his son from captivity, which is locked in Venim Manor - the southeastern part of the Manor District. Varvur Sarethi is under lock and key in the Right Wing of the Venim dwelling. You will find the entrance to the room immediately to the right of the stairs. It is hidden behind a tapestry and guarded by a guard in Dwemer armor, so be careful. Return the captive son to Athin Sarethi and he will agree to support you as the Mentor of House Redoran.
- Miner Arobar. He resides in the northeastern part of the Aldrun Estates District and will support you if you have achieved the vote of Athin Sarethi.
- Garisa Lletri. Lives in the northwestern part of the Aldrun Estates District. It will also support you only after fulfilling the request of Atin Sarethi.
- Hlaren Ramoran. The southwestern part of the Aldrun Estates District. He will cast his vote only after Athin Sarethi supports you as the Mentor of House Redoran.
- Brara Morvain. You can find her in Aldrun, Manor District, Council Chamber Redoran(northwestern part). She will support you, like everyone else, only after completing the task of Athin Sarethi.
Enlisting support from all mentors, go to Bolvin Venim. His house is located in the southeastern part of the Aldrun Manor District. Challenge Bolvin to a duel. The battle will take place in Vivec at the Arena where you should go. Having defeated such a serious opponent in a fair fight, go to Aldrun to Athin Sarethi and he will proclaim you Master of House Redoran.
Master of the Great House Telvanni
To talk with mere mortals, the Councilors of the House of Telvanni use the so-called voices, which are located in the location Sadrith Mora, Telvanni Council House (western part of the city). In fairness, it should be noted that talking to the voices of the Telvanni councilors will not give you anything other than information about the location of these same councilors. But it's still better than nothing at all.

- Mister Neloth. Located in location Sadrith Mora, Tel Naga Tower, Tel Naga Upper Tower. To get to him, you need to levitate to the uppermost floors of his chambers. Neloth will support you if you put him on your side(bribery, persuasion).
- Mr. Arion. His Tel Vos tower is located west of Tel Mora. He will agree to support you as the Mentor of the House of Telvanni, and will also recommend dealing with the Archmage Gothren, since Arion simply sees no other way out of the situation.
- Mrs. Drata. Located in his tower Tel Mora, on the upper floors. To start arrange Drata to yourself by bribery or persuasion, and then ask for her vote, to which she will refuse. Then talk to her again and select " fall at your feet and pray”, after which you will receive her support.
- Mistress Terana. Stays in location Tel Branora, Upper Tower: Terana's Chambers. When talking to her, select "Tell your stories and quickly ask to be a Mentor". Only in this way will an old woman out of her mind vote for you.
- Archmagister Gothren. Located at Tel Arun Tower, which is located northwest of Sadrit Mora. He will refuse to proclaim you Master of House Telvanni, so follow Arion's advice and kill the arrogant mage. After that, return to Tel Vos and Arion will proclaim you Mentor of House Telvanni.
Ready, Fourth test on the way to the fulfillment of the Prophecy of the Nerevarine executed. Return to Nibani Mesa at Camp Urshilaku.
Passing the fifth test of the Seven Visions - uniting the Ashlander tribes
In order to pass the fifth test, you need unite the four tribes Ashlanders: Zainab, Erabenimsun, Azemmuz and Urshilaku.
Urshilaku Nerevarine
Everything is simple here, Sul-Matuul will proclaim you Urshilaka Nerevarine for past merits. The main thing, ask the shaman first Nibani Mesa to have the Chief corresponding item appeared in dialogue.
Ahemmusa Nerevarine

This Ashlander tribe is located north of Vos off the coast of Vvardenfell. To get started, you should talk to one of the gulaghans Tribes: Causi, Duthadalk, Yenammu. Their yurts are located in the northeast of the camp. The Gulakhans will advise you to mention the possibility of you finding a safe place for Ahemmus in a conversation with the shaman.
Sinnammu Mirpal, that's the name of the shaman, will ask you to clear the Daedric ruins for his tribe Ald Daedroth. They are to north of Camp Ahemmusa, on the farthest island. After clearing the ruins, return to Mirpal and lead her to the Inner Sanctuary of Ald Daedroth, straight ahead to the statue of Shigorad(you need to put it on a pedestal). After that, the shaman will talk to you. Ask her to call you Nerevarine and she will do it.
Nerevarine Zainab

The camp is located southwest of Vos. Talk with Kaushad- Ashkhan of the Zainab tribe. Win him over by bribery or persuasion. After that, ask them to call you Nerevarine, and in the subsequent dialogue, choose " Ask for a task". Ashkhan will ask to expel Vampira Calvario from the Ancestral Tomb of Nerano. You will find the tomb in the north-northeast of the camp and in the west of Tel Vos. Having dealt with the vampire, return to Kaushad. Do you get the feeling that everything just worked out so easily? That's right, returning to the Zainab Camp and reporting on the fulfillment of the request, you will receive one more task.
You need find a bride for Kaushad. Yes, not simple, but from high-born. You don’t need to run and offer marriage to everyone in a row. To get started, talk to Shaman of the Zainab Camp. Ask Sonummu Zabamat how to find a wife for Kaushad - Ashkhan of the Zainab tribe, and she will explain everything to you in detail.
Need to go to Tel Arun(the tower is located west of Sadrit Mora). There you should find the slave trader Saville Imain and tell her that you need a beautiful Dunmer slave. To make candy out of a slave you will need: Fine Shoes, Fine Shirt and Fine Skirt. All this you can buy in Tel Mora at a clothing merchant. I'll be ahead of the curve and say that, among other things, you will also need Telvanni's Burning Musk (Tel Arun, Apothecary). After collecting the necessary, return to Imaya in Tel Arun and buy a slave from her.
Give Falura to Llerv all the items of Fine Robe and lead to Ashkhan of the Zainab tribe. After you give him the purchased slave as a bride, he will call you the Nerevarine Zainab.
Nerevarine Erabenimsunov

The tribe is located southwest of Sadrit Mora and north of Molag Mar. Necessary immediately talk to the shaman Manirai. From her words it becomes clear that brute force is indispensable. In order to be called Nerevarine Erabenimsun, need to kill ashkhan of the Ulat-Pala tribe and his henchmen, and then help Khan-Amm become the head of the Erabenimsuns. It would be said.
Ulat-Pal and Ahaz are in the Ashkhan's yurt, and Ashu-Akhkhe and Ranabi are right next door. Sending into the world another warlike part of the tribe, pick up from the phone Enemies defeated: Robe of Assur-Abanba, Fiery Heart of Sanit-Kil, Ax of Ayran-Ammu. Then give them to Khan-Amm, after which he will agree to become the ashkhan of the Erabenimsun tribe. Done, now it remains only to ask to call you the Nerevarine, which Ammu will certainly do for your merits.
After you all four tribes will be called Nerevarine Ashlanders, return to Camp Urshilaku to Nibani Messa and report on the successful completion of the Fifth Test, and also ask about the next, sixth test.
Sixth Trial - Encounter with the god and search for Kagrenac's Tools
Go to location Vivec, Temple. There, at the entrance to the High Cathedral, talk to Danso Indules. He will share information on how you can get to the Archcanon. You need to find a door on the eastern level of the canal bank, and from there you can get into Sarioni's personal apartments. You can do it much easier. Go to the Hall of Wisdom, there find the door to high cathedral- it is she who leads to the chambers of Sarioni. Talk to Archcanon Toler Sarioni and he will give you the key to Vivec's quarters, where you must go. God Vivec resides in his palace- the southern part of the temple, it is hard not to notice.

- Ghost Guardian. Talk to Vivek and he will give you The Wraithguard is one of Kagrenac's artifacts. To destroy Dagoth Ur, you need two more: the hammer-artifact Divider and the blade-artifact Cleaver.
- Delimiter. You will find it in Citadel Veminal, which is located on the northwestern slope of Red Mountain, northeast of Aldrun. The hammer is found by Dagoth Vemin in Veminal, Hall of the Bracelet.
- Cleaver. You will find it in Odrosale, a fortress on the southern slope of Red Mountain, east of Aldrun. The blade is on a pedestal in the Fortress Tower.
Seventh Trial The battle with Dagoth Ur and the release of the Heart of God Lorkhan
Gathering everything three artifacts of Kagrenac, go to the fortress Dagoth Ur- the southwestern slope of the Red Mountain, between the fortresses of Vieminal and Odrosal. To get inside the fortress you need turn the lever just south of the entrance (remember Kai's first task?).
You will find the main antagonist of the main story quest in the location Dagoth Ur, Lower Fixture, Cave of Fixtures. During the conversation, Dagoth will begin to offer an alliance, however, as I wrote above, the passage as a henchman of the Sixth House is not implemented by the developers. Therefore, after ending the conversation with the "Prepare for battle" option, destroy Dagoth Ur.
The first battle will take place in the cave where you met. Here the head of the Sixth House will not pose a danger to you - he is rather weak away from the Heart. However, in Akulakhan's quarters he becomes immortal, so you need to immediately start destroying the Heart of Lochran. In order to do this, you need to perform the following manipulations:
- Hit the heart with a hammer Divider.
- Hit the Heart with the Cleaver.
- Keep hitting with the Cleaver until the Heart loses its power and Dagoth Ur will not be destroyed.
Unfortunately, we do not know how to perform the correct ritual and extract power from the Heart for further use and eternal life, and it seems that this is not provided by the developers.
After the destruction of the Heart exit back to the Tool Cave and continue to move towards the exit from the fortress. Before passing to the next location, the Goddess Azura will appear to you, which will mark the end of the passage of the main storyline of Tes Elder Scroll III: Morrowind.
Congratulations!
It is worth noting that the game does not end there. It never ends at all, so you can go on explore her world endlessly.
The Balmora Fighters Guild is located on the west bank of the Odai River, which flows through the city center. Finding her is easy. If you got to Balmora on the Silt Strider, then just turn left and go a couple of houses ahead. Found? Fine. We go inside, go up the stairs and talk to Aydis Fiery Eye. We express our sincere desire to join the Guild of Fighters (hereinafter - GB). Hooray, we have been awarded the first title - Ally GB. And not far off the first task. We are sent to kill rats. Humiliating? Yes. But you won't write anything. Therefore - forward for orders, ugh, for rats! We need to go to the Drarain Telas house, which is located on the east bank of the river, second from the right in the first strip of houses.
We talk with the hostess of the house, we get the key from her - and ... The case is small. Destroy all rats. There is one rat in the room behind the mistress. We kill and leave the house. We rise to the warehouse and kill the remaining rats. Hard? Come on, everything is elementary. These are rats, though the size of a dachshund ... Oh well. Drarain deals with pillows. Do you need 75 pillows to sell? To me - no. We go down to the house, talk to Drarain and return to Idis in GB. First task completed, well done! Try to demand a promotion after completing each task. After the first one, I was assigned a Beginner. In general, even in this game Morrowind justifies its non-linearity. Passing the game as an elf archer, I did not receive a promotion after the first task, which surprised me very unpleasantly. We take the next task.
But the next task for us will be a trip to the mine. Get ready to run far We head south along the Odai River to the first suspension bridge. Here is the road from the bridge and rests on the mine we need. Great, Passing Morrowind does not stand still! We go into the mine and look for the two humanoids we need: Sevilo Otan and Danila Valas. We go into the mine and move to the queen's rookery. It was there that both lazy people sat down. We kill, which is not difficult at all, and move to the Balmora GB. After completing this task, I was given the title of Wanderer. So, are you ready for the next challenge? Now, we are sent. Not just sent, but to another city. Yes, the passage of the game Morrowind provides that you will visit almost all locations.
We are on our way to the Caldera. I propose to use the services of the Mages Guild, located next to the Fighters Guild. We teleport there and go to kill the four NPCs ordered to us: Alina Aralen, Satas Nerotren, Fotin Herotran and Alveleg. We leave through the southern gate and move clearly to the west, along the mountain. We pass - and voila - we are near the ebonite mine! Morrowind is running! The first of the agents is standing near the entrance, the other three are inside. Taking it off is still not difficult at all. Killed? But do not rush to go out, search through the boxes that are in the cave, and go to the bottom of the lake - there are 29 coins and expensive shoes. See how quickly we are moving forward on assignments. We return home to Balmora with the help of the same guild of Mages and go to Idis to report on the implementation.
Then we are given a not entirely correct task - to bring the code book Sottild. Naturally, she will not give us the book voluntarily. But do not kill her, otherwise you will lose the opportunity to complete the quest for the thieves guild. Because - a direct move to join the guild of thieves. Don't be afraid, it won't hurt us. Entered? Fine. Not? Don't know where? Ah, right! We need the South Wall Tavern. This is where you should join the Thieves Guild. Now entered? Fine. We go to Sottild and start insulting her until she attacks you. Next, we kill. For which we receive a censure from the Thieves Guild, but we have the opportunity to recover by paying a fine. We take the book from the corpse and go to Idis. For completing this task, I was given the title of Swordsman. Ready to continue? Then go ahead!
The next task is pretty simple. We must collect the "debt" from Helvian Dezel from Suran. We get on the Silt Strider to Suran. Got it? Fine. Now look for the Earthly Delights bar and talk to the bartender, the same Helvian Dezel. Convince her by raising her attitude towards you and collect the debt. Everything is simple. Again we return to Idis and hand over the task.
Next, we again have to work as a killer. Dara gra-Bol, not a good radish, lives openly in Balmora. Well, let's go and kill. Her house is next to the house where we killed rats. Killed? Alright, back for the reward! So, we have completed all the currently available tasks that Idis gives. We go to Ald "runes to Percius Mercius. Playing Morrowind, the passage can be extended by completing side quests. Therefore, let me remind you that we are interested in the title of Head of the Guild of Fighters. Therefore, now we have a direct road to Percius in Ald" runes
The first task that Percius gives to our swordsman is to help the eternal guardian Uline Henim. Uline asks us to clean out the lair of the necromancer, which is called You. Percius marks it on our map. But you still need to get there! So, we go to the Silt Strider and go to Huul. From there by ship to Dagon Fel. And from there on foot to you. Not inside you, but in the hideout of an evil necromancer! We ran, we meet Uline Henim, who will express a sincere desire to help you. Well, it helps. Onward to the tomb. We clean everything moving inside. It's simple, my Necromancer fell from one exact hit. The bone lord is, of course, more problematic.... But not so much that Morrowind left the walkthrough unfinished. So Uline Henim thanks us and we go home... Well, almost. We are on our way to Ald "rune. Have you got there? Excellent. We hand over the task. After this task, I was promoted to the Protector. Haven't you got tired of looking for the passage of difficult sections in Morrowind? Then we continue!The next quest is the task of killing Nerera Beneran, who became the leader of the gang in Sargon. Sargon? Don't know where he is? Did you read the assignments inattentively? Nothing, I remember. Sargon is located north of Maar Gan. The right word, like small children! Could not give two tasks at once. They would go there and do everything that is necessary. And now to run again ... But it is better, of course, from Maar Gan than again from Dagon Fel. So, legs in hand - and to the North !!! Sargon is exactly where the main character is in this screenshot.
We go and destroy all living things. There is nothing more remarkable in this cave, except for the ebonite cuirass on the same Nerere Beneran. When playing Morrowind, the passage is delayed due to the huge world, which constantly has to run from end to end. So, after death, we again go to Ald "rune to Percius.Where to go again? To Suran? And not tired? While playing Morrowind, the walkthrough can be lengthy, but still interesting. So, not far from Suran, a gang led by Daldur Saris started up. That's what we have to kill. We get on the Silt Strider to Balmora, from there - to Suran. We find the Oran estate and talk to Avon. He says that these dirty tricks settled in Some Saturan, to the northeast of Suran itself, just beyond the mountains. Well, take the levitation potion - and forward to the northeast! Saturn is very easy to find. Further - out of habit we go in and clean it up. Everything is simple as always. We return to the Oran estate and take the legitimate 1000 coins from Avon. And then we have a direct road to Percius, to Ald "rune. We hand over the task and get the following. Yes, after this task I was awarded the title of Defender.
This time we are asked to work as a courier and deliver booze to the Elit-Pal mine. The mine is located west of the Zainab camp. And, according to Percius, the nearest settlement to the Camp is Vos. So, we get on the Silt Strider to Huul, from there by ship - to Dagon Fel, from there, again by ship - to Tel Mora, and from there, by the same ship, to Vos. From there - walk to the Zainab Camp. And it's not far from the mine. If you look at the world map, the mine is literally one and a half centimeters to the left of the Zainab camp. Therefore, don't miss it. We go inside and look for a certain Dangor, to whom we fuse all the booze. Gave away? Great, now we stomp back, making the same path to Percius. We hand over the task, receive a reward, and find that they will not send us further until we receive the title of Guardian. Well ... So be it, we are on our way to Balmora to Idis. Have you forgotten where she is?
Old friend Idis, how are you, are you healthy, did you get hurt on the last mission? It's good not. Then send us, it hurts to become the head of the guild! Yeah, and the task is this... You need to destroy a gang of orcs who have settled in the Daedric ruins of Ashunartes. So, we are on our way to Pelagiad ... For this, the closest thing will be on the Silt Strider to get to Seid Nin, and from there on foot. From Pelagiad we get to the Arvel Plantation. We keep the path clearly to the north, swim across the water, and along the road to the left. We stumble upon Alof's hut. So it's easier to find it. And so the valiant Alof tells us that the filthy orcs have settled in the ruins of Ashunartes, which are located northeast of his hut. We leave... And forward, in search of the ruins. They are clearly west of the fortress of Marandus. We go, we clean, we come back. See, simple as always. Except that if you decide to take the jewels from the altar, a Daedra will quietly come up behind you. Are you not afraid? Then take it! Yes, and experience will not be superfluous. We return to Idis and hand over the task to her. After completing it, I was given the title of Guardian. Ready for the next challenge? Then go for it!
The next order is to kill the Vereti gang. We, as always, need to kill the head of the criminal group - Dovres Vereti. We are on our way to Pelagiad again. How to get there - you already know, so we will not repeat ourselves. From Pelagiad - to the South-East to Mannamuu, where nasty bandits settled. Don't miss the cave, the entrance is very close to Pelagiad. We go and clean up. You should also collect scrolls of breaking locks for 100 points. Will come in handy in the future. Cleaned up? We leave and go home to Balmora. We hand over the task and take the following
There's a hunger in Sarano's tomb! What a tragedy, who would have thought! Well, that means we're on our way there. Remember how we got to Alofa's hut? We repeat the same path, then we go out onto the road, turn left and, keeping the right side at the forks, we move to the very tomb of Sarano. And then - as always. Let's go and clean up. From the corpse of the hungry, we remove the generic Sarano helmet with a protection level of 144. A very good toy. Killed? Great, let's get out and head home to Balmora. So, congratulations! You have completed the last task of Idis! But they have not yet become the head of the Fighters Guild. So, the road to other leaders!
We are on our way to Vivec. In the Plaza of the Foreign Quarter. We go into the Guild of Fighters and move to Lorbumol gro-Aglak. His first task is to get a ring of jay feathers from a certain Orc named Nar gro-Shagramf. We go to the Hlaalu quarter, to the Plaza, where we take the ring from the impudent orc. This can be done in two ways - kill the orc or raise his attitude towards himself above 80 and then he will return the ring. Choose for yourself which option is best for you.
Next, we go to the Vivec Mages Guild and teleport to Wolverine Hall in Sadrith Sea. We leave the door, go down the stairs and go into the Guild of Fighters. We turn to Comrade Hrundi for assignments. At the first call, he sends us to the ruins of Nchurdamets. Yes, it is far to the south. But it's easier to get there from Molag Mar. So, we travel with the help of the guild of magicians to Balmora, from there to the Silt Strider to Suran, and from there to Molag Mar. Nchurdamts is located to the northeast, it is marked on the world map. We get and talk with Larien Makrina. She asks for help to kill the creature that has settled in the ruins. Well... According to the old scheme. Let's go and clean up. We talk with Larien Makrina and go to Sadrith Mora to hand over the task. After completing this task, I was given the rank of Guardian.
So, Percius is waiting for us again! Since we now have the rank of Guardian, then we can claim to complete the remaining tasks of Percius. That's great, let's go to Ald "rune! After talking with Percius, we find out that the Guild of Fighters was completely crushed under the guild of Kamon Tong. Not in order! We need to eliminate the first assistants of Sjoring, the current head of the Guild of Fighters. And one of them is our old friend Aydis Fiery Eye! The second one is also familiar, but more recent - Lorbumol gro-Aglak. Both are corrupt creatures and attack as soon as you catch their eye. So, let's go to Balmora, kill Idis! She's a good fighter, but where does she care you? After killing her, we go to Vivec and kill Lorbumol gro-Aglak. This is also not difficult. We return to Percius and find out that there is only one step left to cleanse the guild - to kill the current head of the Guild - Szhoring the Hardhearted. Percius gives the key to the chest, in which there is a pair of armor, but for me personally my orc armor was enough.Be careful, Sjoring is a rather dangerous type.But ... The armor is strong and our tanks are fast! to Percius for a sentimental conversation. If Sjoring refuses to attack you, insult him. But do not try to kill him just like that - the whole guild will be angry. So, Sjoring is dead, and Percius appoints us as the Grandmaster of the Fighters Guild! What we have been striving for! Great, we're great. Thank you all for your attention.
On the second floor of Arilla's tavern stands a certain Khrisskar Flatfoot. He will give you the task to find Fargot's cache. Climb up to the lighthouse and at 10 pm or so and patiently observe Fargot's movements from the lighthouse. You will see that his cache is in a hollow stump in the middle of a puddle. When Fargot hides his treasure there, go down and get 300 gold, Fargot's ring (if you returned it to him before) and a master key from the cache. 200 gold to complete the quest will have to be given to Flatfoot, the rest can be kept for yourself.
To the northwest of Seyda Nin, on a small peninsula, lies the corpse of the tax collector Vittelius. Take 300 gold and paper from the corpse. Go to the office in Seyda Nin. Socuzzius Ergalla will instruct to investigate the murder. After talking with the residents, you will learn that the deceased led a secluded life and communicated only with the lighthouse keeper Taver. Taver will talk about the dispute between the murdered man and Forin Gilnit. Gilnit (he is in his hut) confesses to the murder. You can release Gilnit, then he will give the ring, which must be given to Taver; or you can try to arrest him. In the second case, Gilnit will resist and will have to be killed. Give the Ring of Vittelius to Taver, turn in the quest to Ergalla and get a reward.
If you talk to the Silt Strider Rider in Seyda Nin about Vodunius Nuzzius, you will know that the guy is in trouble. Talk to Nuzzius and find out what is the cause of his troubles. Buy a cursed ring from him for 100 gold and everyone will be happy.
Balmora
Exit Balmora and go north along the river, cross the bridge, then go southeast to the mountains. There will be a cave full of raw ebony. Information about it can be transferred to one of three:
1) Velanda Omani (her mansion is located east of Vivec) - 2000 gold as a reward
2) Drum Bero (look for his estate in Vivec, St. Olms' District, entrance through the plaza) - he will offer a choice of Daedric weapons, including a bow
3) Nivena Ulis (her mansion is located west of Suran) - will not give anything as a reward, get off with a promise
Exit Balmora to the north, behind the stone bridge there will be a crossroads, on the hill above which you will find the corpse of Ernil Omoran. Take the Skoum pipe and note from the corpse and take it to Balmora to the Khajiit Cia in her house, it is located not far from the Council Club. Reward: 50 Gold and 10 Moon Sugar.
After asking the inhabitants of Balmora about the rumors, you will find out that Larrius Varro wanted to talk to you about something. It is located in the bedrooms of Moonmoth Fort. Varro proposes to arrange a "bloodbath" - to kill 5 members of the Camonna Tong criminal organization, but he will not tell you the names of the criminals. Names can be obtained from any Thieves Guild informant. He or she will tell you that the Camonna Tong has made her nest in Balmora at the Council Club tavern. This is everyone present in the tavern except the bartender. In order not to pay a fine for killing, one of the gang members can be teased beforehand, if the level of eloquence allows, and then the whole gang will be the first to attack you. After killing members of the Camonna Tong, Larrius will reward you with an artifact Encirclement Ring and the book "Biography of the Wolf Queen".
The same Larrius Varro will tell about the bandit Fjola. Fjol stands at the bridge, not far from Hla Oud, and waits for "careless travelers." Talk to him and when the conversation turns to money, refuse to pay. Then Fjol will attack. Kill him and report back to Larrius Varro. Reward - 100 gold. Don't kill Fjol until you get the quest from Larrius, otherwise the quest won't close.
Caldera
The Nord woman Aeta Wavebreaker, who stands behind the western exit from the Caldera, will ask for the return of her jewelry, namely the ring and amulet taken away by the bandits of the Khajiit Dro'Zhirr. You can find a Khajiit in the Shushishi cave, which is located behind the mountain range, in the foothills, east of the place where Aeta stands. There are two options for completing the quest: 1) kill Dro'Zhirr and return the jewels to Aeta; 2) agree with Dro'Zhirr on the transfer of jewelry for half the reward. Next, you should return the jewelry to Aeta, and half of the reward to Dro'Zhirr.
On the road from the Caldera to Ald "rune, at the first crossroads, there is a naked Nordling Hlormar Pyan. He will tell you that he was paralyzed and robbed by a witch. The witch's name is Sosha Saristiana, she can be found if you go further along that road, turning right at the crossroads. After listening to the story Soshi, decide for yourself who you want to help after this.You can kill Sosha, or you can give Hlormar her offer, to which he will refuse, and then you have to kill him.
Above the crossroads where Hlormar Pian stands, there is a rock behind which hides an orc named Burgol gro-Bagul, who is wanted by the Caldera authorities. The orc will ask you to send a note to his girlfriend Bashuk gra-Bat, who is in her house in the Caldera. Bashuk will give a reply note for Burgol. The award is a diamond.
If you leave the Caldera along the road leading to Ald "rune, and then turn to Gnaar Mok at the crossroads, you will meet a Pemen trader who will ask you to take her to Gnaar Mok. In Caldera you will be told that there is a reward for the head of Pemen. If several times talk to her about it, she will attack.You can kill her and take the Boots of Blinding Speed from her body, or you can guide her to Gnaar Mok, as she asks, and get the artifact as a reward.Note: Boots of Blinding Speed artifact is convenient to wear with Breastplate of the Savior's Skin (see the location of the cuirass in the "Artifact Map" section), which gives protection from magic.
Ald "rune
Merchants Ald "rune Llether Vari, Bival Teneran, Beven Relet, Daines Redotril and Tiras Sadus will offer you a job. A certain Enaz Sarandas borrowed goods from them and now refuses to pay. Sarandas' house is located in the center of Ald" rune, next to the Ald tavern Scar". He will not give money for things, since he still does not have them, so their goods must be returned to the merchants. You can kill Sarandas and take things from his body, or you can, having a high rate of eloquence, shame him, take the goods in a good way, convincing the guy to start a new life along the way. For the return of their goods, each merchant will reward you with a small amount of money.
Falana Indaren, who stands north of the gates of Ald "rune, will tell you that she lost her husband Drelel Indaren. You can find him as follows: you need to exit the same gate and follow the road to the northwest. Away, the road is divided into two forks, who meet after some distance.The desired husband is hiding behind the stones, on a hill, in the middle of this fork.The reward for finding him is the book "Dance in Fire, Part 2."
You will meet this lady on the way from Ald "rune to Fort Motley Butterfly. In no more than two days, you must escort her to the altar at the Ghost Gate. By completing this guide mission, you will receive 100 gold "for tea".
On the way west from Ald "rune, towards the fortress of Andasret, about halfway to it, you can find the Argonian Rasha. Rasha will ask you to deliver several shirts to Ald" runes to the dressmaker Bival Teneran. Swear to deliver Bival's shirts. Rasha does not need to report. The dressmaker will give the reward - Belt of Iron Will.
Another naked Nordling, and besides, also paralyzed, can be found in the Western Highlands region, west of Ald "rune. To do this, you need to leave the city through the main gate and go straight along the road until the ash desert of Ashland is replaced by the rocky region of the Western Highlands In this place at the crossroads, turn left and you will see this Hisin Deep-Raed, that's his name. To help the Nordling, give him a potion of cure for ordinary diseases (you can buy it in the Ald "rune, in the Temple) or cast a spell with this effect on him . As a reward, Deep-Raed will give his hat, enchanted to protect against the cold.
Lucan Ostorius can be found in the Western Highlands region, southwest of Dushariran Shrine. He asks to deliver weapons to Yaku gro-Skandar in Ald "runes. Gro-Skandar is found in the tavern "Rat in a Pot". The reward is 100 gold.
Hassur Zainsubani, located in the Ald Scar Hotel and known to you by one of the main quests, will ask you to find his missing son Hannat. The son went to the Mameya underground complex and did not return. Despite the fact that the quest is not marked in the list of quests in the journal, it can be completed, for this you need to go to Mameya. The entrance to the caves is next to the aforementioned Dushariran shrine. Hannat is located in one of the caves of the underground complex. Take him out of Mamei and go to Ald "rune for a reward. Hassur Zainsubani, having heard from you a kind of "password" that Hannat will tell you, will give you several pieces of raw ebonite. By the way, in the underground complex of Mamei you can find several much more valuable items - an artifact dagger and a Daedric helmet.
This quest will appear after the elimination of the base of the Sixth House in the Ilunibi cave. Gindala Hleran in the Ald "rune (she is walking along the street) will report that some strange person has climbed into her house, and will give the key to her house with a request to remove it from there. In Gindala's house - Sleeping. Just kill him, you can attack first , you don't have to pay the fine.
ebengard
Llalam Dredil (he is in Ebonheart's castle, on the second floor, next to Duke Dren) will ask you to deliver a letter to Jay'Zhirr at the Eastern Imperial Company in Ebonheart. The Argonian, after reading the letter, will ask you to take the answer back to Dredil. Dreadil will pay 75 gold for the job.
The quest is given after completing the "Package for Dreadil". Bosmer Bolmer (Ebonheart, East Empire Company Premises) will ask you to steal the list of clients from the enchanter Odenian Valius (Vivec, Telvanni Settlement, Belt). The list is in the second room, on a shelf. Guarded by two rats and a Hunger that will appear when you take the list. List reward from Bolmer - 700 gold.
Vivec
The quest is given after completing the "Package for Dreadil". Dressmaker Mevur Hlen (St. Olmes's, Tailors and Dyers' Hall) will ask you to steal a price list from the East Empire Company in Ebonheart. The price list is with Jay'Jir, to the left of him in the room, in the chest. This is the same letter that you took to him. The reward is an increase in trade skill by 2 points.
Blacksmith Alsurion (his forge is located in the plaza of the Foreign Quarter) complains about his closest competitor and wants to intercept his order. Go to his neighbor Telvur (his shop is here, on the plaza), open the inner door. The order is in Telvur's room, on the chest of drawers. Take it to Alsurion and you will be rewarded with a cheap hatchet.
Enchanter Miun-Gei (Foreign Quarter, Lower Belt) complains about a pesky fool who is ruining his business. The jester stands at the door of the Argonian's shop. The guy (his name is Mariel Maurara) will tell you that he is an actor and is looking for a job. By questioning the local population, it can be found out that a certain Crassius Curio is currently staging a play. The Curio Mansion is located on the Plaza of the Hlaalu Settlement. Talk to Crassius, find out that he needs actors, and then pass this information on to Mariel. After that, he will leave and Miun-Gei will reward you with an enchanted spear. If you are too lazy to engage in the employment of an actor, just kill him.
In the District of St. Delin, on the plaza you can meet the almost invisible Cassius Olsinius, who will tell you that he was cursed by a wizard. Go to Cassius' father, the merchant Lucretinaus Olsinius (his shop is nearby), who will give 75 gold for helping to save his son. Talk to Wizard Fevin Ralen (located in the Telvanni Settlement). It turns out that Cassius ordered him a spell that made the young man invisible all the time. Fevin refused to remove the spell, since Cassius did not pay him 400 gold for the first spell. Pay the wizard out of your money, Cassius's father will return it and another 100 gold on top when his son becomes visible.
There are rumors all over Vivec of mysterious murders of the Ordinators. Local authorities are looking for someone who can help. Go to the Hall of Justice, go to the Office of the Order of the Watch and talk to Alam Andas. After that, go to the Foreign Quarter and ask about the Dunmer with the dagger. A similar person was seen in the sewers, and look for her there. After you kill her, Andas will offer an Indoril helmet and cuirass or God Armor Belt as a reward. Despite the loud name, the belt is an almost useless trinket, so it is better to take the ordinator's armor.
Tarer Brarin (he is in the office of the Order of the Watch, entrance through the Hall of Justice) quarreled with the archmage Trebonius (Foreign Quarter, Mages Guild). Trebonius cast some kind of nasty spell on Tarer and he became covered with a disgusting rash, now he will ask you to convey his apology and a gift to the archmage. Talk to Trebonius and give him the book of Brarin. With a high enough location of the archmage, you will receive a healing potion. Return with him to Brarin. Reward - 100 gold.
Merchant Balen Andrano from the Redoran Settlement will complain about problems with competitors and ask you to put the bone of a dead Dwemer in the chest of the merchant Jean in the Foreign Quarter (the entrance to her shop through the Canals). Be careful, Jean must not see you, otherwise the quest will fail. If the bone can be planted unnoticed, Andrano will thank and present an enchanted amulet. After that, go to Jin. She will complain about a Dwemer ghost terrorizing her shop. You need to either pull the bone out of the chest or kill the ghost. As a reward from Jean, you will receive an enchanted ax of little value, as well as Andrano's amulet.
In the plaza of the Outlander Quarter, Redguard Domalen is handing out leaflets that say that Auran Frernis is deceiving his customers. If you come with such a leaflet to Frernis (her pharmacy is located in the Lower Belt of the Foreign Quarter), she will explain that this is slander and ask you to find out who distributes the leaflets. Go back to the plaza and ask Domalen who gave him the flyers. In a conversation, it is necessary to say that Auran is an honest woman, then Domalen confesses that Belan, a pharmacist from the Telvanni Settlement, ordered the leaflets. You can take money from Belan for silence, or you can tell Auran about everything. You can also kill Domalena.
If you helped Auran Frernis with the leaflets, she will give you this task. She needs a rare variety of golden kanet called Roland's Tear. Five of these flowers, and Auran needs exactly that many, grow in the vicinity of the sanctuary of Ald Soth, which is northeast of Vivec. "Roland's Tear" outwardly is no different from the usual golden canet, but the flowers of the plant will bear just such a name. A rare kanet grows in the easternmost part of the shrine, where the Daedric ruins end. Bring it to the apothecary and get a potion of increasing luck.
Rumor has it that a merchant in the Telvanni Settlement has a problem with rats. This is the enchanter Odenian Valius, whose shop is located in the Telvanni Settlement Belt. He will ask you to get rid of the rats in the dungeon. There are two unique Telvanni rats there. Kill everyone so as not to make a mistake, and report to the merchant. The reward is a great soul stone.
Talk to the merchant Gadayn Andaris (his shop in Hlaalu Settlement, entrance through the plaza) about the love letter. The letter itself can be found in the flower bed to the right of the store. Gadine will say that he has been in love with Eraldil for a long time, but he does not have the courage to confess to her, and will ask to speak with Eraldil for him. Eraldil (a wood elf, walks in the Settlement of Hlaalu, the Belt) will say that she is not interested in Gadayn, and will suggest that he pay attention to her cousin Glatel. There are two options for completing the quest: 1) tell Gadayn about Glatel. Reward from Gadine - Robe of Flame Reflection; 2) Gadine will offer to take the love potion to Eraldil. Reward - Ring of Light (garbage). The first option is better, as everyone will be happy. Come back for a reward in a few days.
North of Vivec, along the road, you can meet the merchant Teris Raledran, who will ask you to accompany him and the guar Rolly to Vivec to the tailor Agrippina Herenia (Foreign Quarter, Canals). If successful, you will receive 200 gold, if the guar dies - only half.
This quest can only be obtained after you have freed over 30 slaves. If you ask Jobasha (Foreign Quarter, Lower Belt, Jobasha Rare Books) about the Two Lamps, he will talk about the suffering of Khajiit slaves and give 3 books that increase the skills of acrobatics, accuracy and weaponsmithing.
Merchant Alarvine Indalas (Saint Delin's District, Glazier's Hall) will ask you to steal a cargo of alabaster ware (5 cups and 5 bowls) from a ship in Ebonheart in order to harm Bolrin of the East Empire Company. Cargo aboard the Chun Wook ship, on the lowest deck, in one of the boxes. Give the stolen dishes to the customer. Reward - 1500 gold. Option 2: We return the cargo to Bolrin (see "List of clients"). Reward - 500 gold.
Trader Tinos Drotan (Northeast of Vivec, West of Ald Sotha Shrine, off the road, near a boulder) is robbed by his guards and will ask for the stolen Raw Glass (10 pieces) back. The kidnappers Alvur Hleran and Dondir took refuge in the nearby cave of Beshara (south of Ald Soth). Glass in the chest. Criminals can be killed or left alive. You can take the glass in any other place. Either way, the reward is an increase in Trade skill by 1.
Moroni Uvelas (Saint Olmes's, Brewers and Fishmongers' Hall) is rumored to be looking for her missing husband, Danar. Talk to her, she will tell you that she assumes that her husband is in the sewers of St. Olmes County. Go down there through the Channels. The corprus hunter roams the sewers, this is Danar, infected with the corprus. Kill him, take the ring from his body and return Moroni.
Nord Ennbyof (Telvanni Settlement, Belt, Lizard's Head tavern), if you treat him with a jug of matzta and ask about the "little secret", will tell you about the tomb of the ancient ruler of the Nords and the ax Buri Kiss buried with him and give the keys to the tomb of Tukushapal (north -west of Tel Branora, where this ax is located). This information is not a quest, but gives a chance to find an artifact weapon.
Sadrith Mora
The South Tower of the Gateway Inn is haunted by a ghost. It is useless to kill him, when you re-enter the bedroom, the ghost appears again. Altmer Angaredel (standing at the entrance to the tavern) will ask you to rid the tavern of the ghost and send it to the Voice of Lord Neloth, Mages Arara Uvulas (she is in the Telvanni Council House). Arara will talk about her suspicions, she believes that the appearance of a ghost is a joke of the Witchcraft expert. Any resident of Sadrith Mora will tell you that Uleni Heleran of the Mages Guild in Wolverine Hall is an expert in Witchcraft. The enchanter in the Guild of Mages will tell you that Uleni Heleran disliked Angaredel for some reason and often moves to the Gate Inn with the help of a spell. Convince Uleni to stop the magical mischief by hinting to her that the joke is no longer new. As a sign of consent, she will give the note to Angaredel. He will offer a choice of a Fighter's Ring, a Mage's Ring, or a Thief's Ring as a reward (all things are of no particular value).
If you move south from Sadrit Mora, on the peninsula you will find the entrance to the Arenim ancestral tomb. There you will meet Satiana, who will ask you to help find her father's amulet. If you refuse, Satiana will attack you. First you need help finding the key. He's downstairs, near the skeleton's arm. Amulet on another skeleton.
Pelagiad
On the road, northwest of Pelagiad, you can meet the Breton Morri Ormin, who was attacked by a bandit. Morrie has fallen in love with the robber and will ask you to find him and give him her glove. The bandit Morri is talking about is called Nelos Onmar and is located in Pelagias, in the Midway tavern. After you give him the glove, he will ask you to take the letter to Morri Ormin. Upon receiving the letter, Morrie will thank you and offer to visit: if your character is male - her friend Emuset Brakwes in Tel Arun; if female, her acquaintance Barnard Ereli in Tel Branore. Both of Morri's acquaintances are in the taverns of their respective cities. As a reward, you will receive three exclusive health restoration potions from them.
You can find this vessel in the Ulumussa cave (to the left of the road, northwest of Pelagiad). The healer Ygfa (Fort Pelagiad) will recognize the vase and say that its owner is Pierrenette Beluel. Take the bowl to Piernett Farm (somewhere between Vivek, Suran and Dren Plantation) and give it to the owner. The reward is an increase in Trade skill by 1 point.
Khajitka Anassi (Pelagiad, Halfway Tavern) will tell you that she is threatened by Camonna Tong member Daren Adrin and can be found in Nadine Rotheran's shack in Gnaar Mok. Talk to Daren and when he attacks, kill him. Next, Anassi will ask you to find her husband J'Dannar (Vivec, St. Olms County Canals) and help him get rid of the harmful craving for skooma. Bring him the Confessions of a Skooma Eater. The book can be bought, for example, at Jobashi's store (Vivec, Foreign Quarter, Lower Belt) or from the bookseller Codus Collonus in Ald "rune. J'Dannar, having received the book, will tell Anassi that he says goodbye to her forever. Anassi will give the key to his at home in Pelagiada and asks you to visit her there.Next, Anassi will direct you to her friend Senindi (Vivek, Arena, Arena Fighters Apartments), who, being a master trainer in Acrobatics, will give you a book on pumping this skill.Anassi will then want a flower as a gift (Vivec, Telvanni Settlement, Tower, entrance through the plaza, in the closet next to which stands Mavon Drenim) The reward for the robe is 20 ebony throwing stars, worth 2000 gold each. Anassi will also tell you about the secret underwater passage to the Imperial Commission and about Elvulla's Black Blindness glove.
If you go from Seida Nin on the road to Fort Pelagiad, and after passing through the mountains turn to Vivec, you can meet Nels Llendo, who will demand 50 gold from you. If your character is female, you will be offered to pay with a kiss. If you refuse to pay without being feminine, Nels will attack. If you pay, Lendo will say that he can be found in Pelagiad, in the Midway Tavern. Later, he will appear in the tavern and will teach some thieving skills.
Pilgrim Nevraza Dralor (on the way from Pelagiad to Hla Oud, in the place where the road goes around the foyada, near Morri Ormin) will ask you to take her to the altar in the Fields of Kummu. This location is marked on the map after reading the book "The Pilgrim's Way". The reward is 150 gold if you reach it in two days.
Ald Velothy
In the southeast of Ald Velothi, near the river, there is a cave called Palansur. There, on a high perch, sits, dressed in a woman's skirt, the sorcerer Invold. The sorcerer will ask you to bring him a levitation potion, which he needs to escape. The reward will offer a choice - a skirt or a hat. It's better not to take anything.
Redguard Sason (standing by the road, east of Ald Velothi and south of Huul) is looking for a wife who was kidnapped by Daedric cultists to be sacrificed. Malexa, the wife of Sason, is in the shrine of Ashalmavia (to the east of Ald Velothi, very close).
gnisis
Southwest of Ald Velothi, north-northwest of Gnisis, or southeast of the Dwemer ruins of Arktanduch-Sturdumz, on a hill, you can find a Redguard Legionnaire Din bitten by killer fish. We need to cure him of a common disease. Gives 30 gold. If you can't heal, take Dean to Mehra Dror, a healer in Gnisis.
Sinette Jelyn (near the pond in the same area as Dean from the previous quest) will ask you to find her ring, which she lost in the pond. When you enter the water, go forward a little, the ring lies at the bottom on the left. It is black and green and lies among the algae, so it will not be easy to find it. The Cat's Eye spell can help, the higher the percentage, the better. Or just increase the brightness in the game settings. When you give the ring to Jelyn, she and her almost invisible accomplice will attack you. Kill both. With the "invisibility" you can remove an excellent amulet with an 80% Chameleon spell, which can make you almost invisible.
In Gnisis, not far from the silt-strider, below, in the water, stands Khentus Jansurnummu and asks to take his pants from Hainab Lamasi (this type in a blue shirt walks around Gnisis, somewhere near the Temple). If Hainab's attitude towards you is 80 or more, the pants will be returned. Reward from Hentus - 3 hacklelow sheets.
hla oud
In Fatfoot Point, in the dungeon where the locked hatch leads, there is the slave trader Relam Arinith, who will ask you to deliver the Khajiit slave Rabinna to Balmora Vorar Helas. If you question the slave, it turns out that she has moon sugar in her stomach, which Arinith thus passes to Helas. There are several options for completing the mission: 1) Escort the slave to Ebonheart, the Argonian Mission, and receive 400 gold and +10 points of Two Lamps as a reward from Im-Kilaya. Take a ship from Hla Oad to Ebonheart, and there will be quite a bit of walking; 2) Take the slave to Vorar Helas (Balmora, home of Vorar Helas, next to Kai Kosades). The slave will be killed, and you will receive 400 coins and a ring. The first option is much preferable. By the way, the slave will refuse to talk to you at a low initial location, and this will be if you do not have a high enough reputation (<5) в Морровинде. Проблема решается с помощью заклинания очарования.
Breton Daric Bielle at the House of Earthly Delights in Suran will ask for help in finding an escaped slave named Haj-Ai. Residents of Suran will advise you to talk to the slave trader Dranas Saratram (in the building of the slave market). The slave trader will say that Hiding Eyes (and this is the name of the guide Darik Biell) in Argonian will be Haydzh-Ay. We find the Hiding Eye in the House of Earthly Delights. Then there are two options: 1) let go of Hajj-Aya; 2) try to detain him, while he will have to be killed.
If you exit Suran from the side of the silt strider, cross the suspension bridge and go forward along the road, you can meet the Argonian Thule. Tool will reveal that he is a runaway slave from the Dren plantation and will ask him to help find a safe haven for the abolitionists and their Redguard representative. Redguard's name is Sturdekan and he is located near his farm, which is further along the road to the northwest. When you escort Tul to Sterdekan, it turns out that he is not a runaway slave, but a member of the Camonna Tong. Tool will have to be killed.
On the road east from the altar of the Fields of Kuma, you can meet Thoronor, who will ask you to find his friend Edras Oril. Edras Oril, who is further down the road, will refuse to come with you until you kill a couple of kagoutis blocking the path or give Edras an invisibility potion. Bring him to Thoronor and get the Fall Slow Amulet.
Merchant Ashumanu Eraishah in Suran will tell you about a dangerous madman not far in the mountains. In the northeast of Suran, in the mountains, on one of the paths, stands this madman - the orc Umbra. He will tell you that he is tired of living and wants to be helped to die with a sword in his hand. He is a worthy adversary. If you kill Umbra, you can take his eponymous artifact sword for yourself.
Trader Paur Maston (southwest of Suran) should meet his companion Vanjirra (walking next to the bridge) in Molag Mar and ask to be escorted to her. The reward from Vanjirra is a cheap amulet.
Tel Branora
Altmer Mollimo of Cloudrest offers to kill Treraina Dalen. Treraina with five comrades stands near the city, on the way to the pier. Use your eloquence to annoy Treraina. Not only she will attack, but all her escorts. Kill everyone. One of the escorts will have a Dwarven crossbow, and Treraina herself will have a glass staff. Reward from the Altmer - 1000 gold.
On the road near the tower of Hanud, which is west of the fortress of Indoranion, there is a naked Nordling Bortrir. He was robbed by the witch Iveri Llotri (west of Bortrir, northwest of the tomb of Andalor, by the fire). Kill the witch and return the ax to Widowmaker Bortrir. The reward is an increase in the Ax skill by 1 point.
Camp Ahemmusa
The seer Urshamusa Rapley (a Dunmer girl in a blue robe, walking around the camp) will ask you to find a white guar that will save the tribe from pestilence. Guar - at the fork in the road west of the camp and south of the Daedric ruins. When you see the guar, it will start moving west and lead you to the healer's corpse. Take the amulet from him to Ashaman and bring it to the shaman. The tribe will be saved. You can just find the corpse and return the amulet. Either way, the reward is an enchanted shield of little value.
On the way west from the camp of Ahemmusa, you can meet Atanden Girith, who will say that he was robbed by the Ashlanders. Go to the camp of Ahemmus and ask about the attack there. You will be told that two expelled Ashlanders did it. You can find them in the south of the camp, on the coast, next to them - a fire and a pack guar. When you try to talk about the robbery, these two will attack you and you will have to kill them. Take the skins belonging to Girith from the body of Emul-Ran and return them to their owner. Girith will send you to Tel Mora to the trader Berven, and she will thank you.
Erabenimsun Camp
In the region of Molag Amur, near the lava flow, where the torn pages from the book are lying, you can meet the Argonian Rhee-Ja, who escaped from the slave market in Tel Arun and will ask you to help him get to Ebonheart to the Argorian Mission. There are three options to complete the mission: 1) bring Ree-Ja to the Argonian Mission, talk to Im-Kilaya there and get the Belt of Blood (nothing special) and +10 to the location of the Two Lamps; 2) take the slave to Tel Arun and hand over to the slave trader Savil Imain (on the street near the cages of slaves). Reward - 150 gold; -10 to location of Two Lamps; 3) let some monster kill a slave on the way, then talk to Savil Imain. Reward - 50 gold; -10 to location of Two Lamps.
In the Molag Amur region, on the road, you can meet the Imperial Marsus Tullius, who will report that he was robbed by the Ashlanders, stealing a cargo of guar skins. In the camp of the Erabenimsun tribe, the Ashlanders Tinti and Hairan can be found out that the guars, and, accordingly, the skins belonged to the Ashlanders. There are two options for completing the quest: 1) persuade the Ashlanders to give the skins and give them to Marsus on the condition that he does not approach the lands of the tribe, then go to Tel Arun to his father Stentus Tillius (walking along the street) and receive a reward of 200 gold; 2) do not take away the skins from the Ashlanders and receive the Shepherd's Belt as a sign of friendship, and explain to Marsus that the skins belong to the Ashlanders.
Editing: Bianca
Right, my lord, left, my lord, steps, my lord...
Constance from The Three Musketeers
If you have read the previous parts of this guide, then you certainly understand: the passage of Morrowind is a conditional concept. It can be played in a hundred different ways. But there is still a set of tasks that are solved in a certain way. And we will start with those that are necessary to complete the game.
All other tasks are a personal matter and the choice of the player. Of course, many of them are useful and make life much easier, but you can do without each of them.
In fact, you landed on this island as an imperial agent, who must deal with a strange cult of Morrowind and some prophecy, extremely popular in this cult. And also with diseases of corprus and pestilence (Blight). And as soon as it appears on Morrowind land, the ball begins to slowly unwind...
At the same time, you receive missions from all and sundry, for example - from guilds. But this is a completely different story and will be discussed in a separate chapter.
It’s not worth it to delay the execution of the main missions at all: disease and damage spread across Morrowind quite quickly, and the ending of the game depends on your actions.
So - the main tasks.
Letter to Kai Cosades
Having answered the questions of the guard, that is, having created his character, we immediately receive an order from Sokutsiy Ergalla (an official in the office): to deliver a package to the city of Balmora, to a certain Kai Cosades.
To carry out this is not easy, but very simple: we walk to the nearest station of riding pincers and buy a ticket to Balmora.
Balmora is bisected by a large river; the desired gentleman lives on its eastern shore, on the northeastern edge of the city (in the tavern to which Sokutsiy sends us, he has not been there for a long time, but you can get the address there).
Kai, having received his package, will initiate us into the Blades - this is an organization of imperial spies. In this capacity, the hero will have to go through several trials ... In other words, from now on, we are at the disposal of Cosades. He will even kindly provide us with a couple of hundred gold pieces so that we can adequately equip ourselves for the journey.
The tests will consist mainly of missions to collect information regarding the cult. The problem is that Kai's informants don't share data for free. And they will have to work hard for them.
Hasfat and Dwemer box
Let's use Kai's generosity properly (according to our skills and tastes) - and return to him for orders. He sends us to Gasfat from the military guild for the necessary information and warns that Gasfat will not part with the information just like that, so he will have to serve.
A place with that name cannot be reached by regular tick flights, can it? So you have to walk. We stomp to the south, leave the city and cross the river over the bridge. At the crossroads with signs, we prefer the way to Caldera (northern road). Soon another sign with the inscription "Molag Mar" comes across - it decorates a small branch to the right. Let's follow him. The path will climb into the mountains and cross the old bridge.
On the bridge we are attacked by a sorcerer with a skeleton. Let's not confuse cause with effect and waste energy on resting the skeleton: let's deal with the magician, and the skeleton will fall apart on its own.
To the south of the bridge is the entrance to the desired ruins. Turn the tap on the pipe - and we're inside.
On the pebbles we got to the lower level and climbed up on the other side of the cave. Outside the door of the "Rooms of the Empty Hand" we are attacked by some bad type; on the left on the bottom shelf - the ordered box. After the death of the type, we grab it and get out back the same path that we came.
By the way, just for information: the mysterious Dwemer are none other than dwarves. This is how the word has changed over the years. The trick is that the word dwemer very reminiscent dweomer- a curse. Wordplay...
Gasfat pays for the box with papers for Kai.
Llull and his skull
Our inquisitive Kai is still not satisfied. Now he needs data from the Balmora Mages Guild. The counterparty is an orc wizard with the poetic name Sharn gra-Muzgb. Guild - next to the military, next door. Mr. Muzgb lives at the bottom left.
A certain Llull Andrano (how I like the local names!) allowed himself to be buried in the family vault. Reckless, because the orc needs a Llyul skull, and we have to bring it. Something does not differ in fantasy, these "informants" ...
Sharn, if you ask him better, also equips us with a blade and scrolls.
To the south of Pelagiad, at the very fork in the road, is the desired tomb. Down the stairs, left along the corridor to a room with a couple of skeletons. On the other side of the room is a door to the next corridor; we go down, on the right behind the door we need a skull. We take it to Sharn and ask about Nerevarine. Having received information for Kai, we return, and we are promoted to the students of the Blades.
Three from Vivec
At night you will have a strange dream. Without sleep, you return to Kai. He sends you on a new mission. You will have conversations with three more people. All of them can be found in different districts of Vivec:
Addhiranirr, a Khajiit of the Thieves Guild, in St. Olms;
Yulei, an Argonian from the Morag Tong, at the Black Silk Bar, located in the lower tiers of the foreign quarter;
and Meru Milo, the copper-haired temple priestess, in the library of the Hall of Wisdom and Justice.
Kai will give you a parchment with addresses and 200 gold to brighten the path.
The Long Distance Tick will take you to Vivec. If you do not want to stomp through the whole city, let's start with what is closer - from the Foreigners' Quarter. There you need to find Julia. The lower rows can be accessed by walking down one of the four ramps and entering one of the doors marked "Lower Rows". "Black Silk" is located in the middle corridor on the east side. Argonians are quite conspicuous, so it is unlikely that you will be able to confuse him with someone else. During the conversation, he will mention that he needs to go to his friend's bookstore, but some boobies won't let him in. Ask him about everything without missing a single topic, and you will find out that his friend's shop is nothing but Jobasha's Rare Books. But there are boobies, and they really prevent him from passing! Chat with one of these instances. By the way, what gender are you? Depending on this, you will either have to bribe him or just charm him. Now you can mention that dirty lizard over there. If they answer that they do not care about her - your task is completed. You can explain to Julie that he has nothing to be afraid of. He will still ask you to walk him to the store. You will find Jobashi's shop in the middle corridor on the west side of the Lower Rows. Once inside, you can finally have a quiet conversation about the Nerevarine Cult, and he will give you notes for Kai.
Now it's Addhiranirr's turn. Exit the Lower Rows, down the stairs, across the bridge south to Redoran Canton. From there across the east bridge to the canton of Arena, and again across the bridge to the south to the canton of St. Olms. From there you need to go to the eastern or western border of the canton, and from there to the Rows. Come in. The stairs lead down to the Canal. Still down, through the hatch - in the dungeon of St. Olms. That way. Addhiranirr can be found on the northeast side of the canal. Talk to her. She will talk about her little problem. She is being followed. Ask her about the tax agent. She wants this gentleman to leave, and until you achieve this, she does not want to talk to you. The tax agent is sitting upstairs in the ranks of St. Olmes, not far from where you entered. Meet Duvin Platorius, you will find him on the north side. Talk to him. I'll have to lie: she de departed for the continent. Now, with a sense of accomplishment, return to Addhiranirr Society. Ask her about the Cult of the Sixth House. She willingly shares everything she knows. Having finished with Addhiranirr, return and leave the canton of St. Olms.
Well, the last interview... Measure Milo. Get into a solemn mood and go to the southwest corner, across the bridge to the Temple Canton. Enter directly into the Hall of Wisdom. Walk halfway down the corridor (following the Attendant), up to two ramps on the left and right. Follow them to the library. There you will find a copper-haired lady - this is Mera. Talk to her. She will take you to a room behind the library, where you will ask her about the Nerevarine cult and the book Ascending to Truth. She will advise you to take a copy of Rising to Truth to Kai. By the way, this copy is on the top shelf in the southwest corner of the library. You can steal it. Although, if you are afraid of getting caught (suddenly your thieving skills are not so great), you can buy (or still steal) the book in the Jobasha Rare Books store in the Foreign Quarter.
Return to Kai. After talking with him, you will receive the title of Journeyman of Blades. Well, 200 gold at the same time.
Ashtray Informant
Kai says you need an ashtray informant, and he has someone named Hassor Zainzubani in mind. True, this Hassor loves gifts, so Kai gives you 100 gold for a small present.
The travel pincer will take you to Ald-Run. You can find Hassor Zainzubani in the Ald Kkar Inn, in the northwest corner of the city, just behind the Council Club. Go to the bar, to the right of the bar - stairs down. Go down it, and in the back of the room you will find Hassor.
Talk to him about business, yes, by the way, take an interest in the custom of giving gifts (if you say something wrong, he will be offended, and your reputation will fall). Ask him for a "smart gift" and he will accept your offering. Now you can get down to business - to the "ashlanders". He will give you a note for Kai.
Take the note to Kai. You will receive the title of Blade Seeker and find out what was in the package that you delivered to Kai. It turns out that the Emperor believes that you may be one of the executors of the prophecies of the Nerevarine. You will receive a decrypted copy of the package and 200 gold.
Tribe Urshulaki
Now Kai wants to send you to Urshulaki's camp, talk to two ashtrays named Sul-Matuul and Nibani Maesa.
Again on a tick to Ald-Run, transfer to Maar Gan. Exit Maar Gan to the east, turn north onto Foyada Bani Dad. Along Foyade north to the sea. The wreckage of the ship at the mouth is a sign. Swim east through the ruins of the Crypt of Assur Nabitashpi. Avoid encounters with Daedra - they are strong and aggressive. Urshulaki's camp lies to the east of the ruins, in a hollow.
When you arrive at Urszulaki's camp, you should talk to any ashtray you meet. Talk about the Nerevarine prophecies. Tell them that you have come to fulfill the prophecies and wish to speak with Sul-Matuul and Nibani Maesa. They will want to test you and send you to Zabamund. The Yurt of Zabamunda is the second from the right of the many yurts in the Great Pavilion to the south. You will be able to prove the veracity of your words with the help of gold - say to Zabamund: "Nerevarin Prophecies" - and offer a donation of 200 gold. He will take you to Cinder Khan's yurt to talk to Sul-Matuul.
Pepel-Khan's yurt is the next one to the south. Sul-Matuul should be asked about the rite of passage. Sul-Matuul will want you to get him a family heirloom... Sul-Senipul's Bone Bow from the Burial Caverns of Urshulaki, and only then will he allow you to speak with the wise woman Nibani Maesa.
The cemetery lies to the south-southeast of the camp. The door is located on the northern slope of the hill halfway between the camp and the slopes of the Red Mountains. The easiest way to find the Cemetery is to walk along the shore. At the heap of stones turn exactly to the south - and you will come to the cave.
Do this in the cave. Along the corridor to the hall filled with water, go south until you reach the crypt of Laterius. Up the stone spiral - go out into Yuno's crypt. There, fight the ghost, and in his remains (hmm?) You will find the bow you are looking for.
Sul-Matuul will happily perform the initiation ceremony with you. You are now a friend of the ashtrays. As it turns out, they don’t need a bow at all, leave it to yourself. Commendable disinterestedness, by the way! Some Imperial informants could learn from the desert barbarians...
Since you got a place in the clan, you can now see Nibani Maesu. She lives in the northernmost tent - Yurt Wise. Tell her you passed the test, and ask questions about the prophecies to your heart's content. Nibani Maesa will give you two books - The Wanderer and The Seven Visions - and will send for another one called The Lost Prophecies. (As you may have guessed, there are enough books here, to read - do not re-read!)
Strictly speaking, you have already completed Kai's task, the book will wait. Tell Kai about her, he will send a message to your friend Mere Milo. And so that you do not get bored, while Mera finds time to answer, you will receive a new task.
Base of the Sixth House
In Fort Bakmot (I hesitate to translate this as a name), you have to talk with Raesa Pullia and find out what she knows about the base of the Sixth House. She knows mainly that a certain Dagoth Gares has lived in the world. 400 gold for the track - go!
This fort is almost next to the southern gate of Ald-Run. Raesa can be found behind the door right at the entrance. The essence of her message boils down to the following: a soldier sick with corprus appeared from the base of the Sixth House (now you will have to deal systematically with this unpleasant disease). The soldier soon died, but revealed that the base of the Sixth House was Ilunibi. Somewhere near the island of Gnaar Mok. "London, City, ask at the corner."
Take the Balmora Road to the west, at the Gnisis-Balmora-Ald-Run junction, turn south and immediately turn onto the western path to Drulin's house. On the impassability, go west to the coast, to the fortress of the dark elves. Not far from where you come ashore, in the south, you can see the island of Gnaar Mok, kindly connected to the mainland by a bridge. The island of Ilunibi stuck to it.
There, visit the following doors (I give the name without translation): Tainted Marrow, Marowak's Spine, Blackend Heart, Souls Rattle. There you will meet Dagoth Gares. By killing him, you will become infected with corprus; don't panic, it's meant to be. Rob Dagoth's body and return to Balmora.
Kai will honor you with another rank in the organization.
The cure for corprus
Kai has an idea what to do with the corprus. An ancient mage from the House of Telvanni, Divayth Fir, has a "corprusarium" and needs to know how to cure the disease. Kai gives you an artifact, a decent amount of money and a couple of potions and refers to him.
Telvanni of the Fir clan should live in Tel Fir - simple and logical, right? The easiest way to get there is with the help of the Mages Guild in Balmora, paying them to travel to Sadrith Mora. Exit the building and swim southeast to the tower. To get into the tower, spells are needed, because the magicians of the stairs did not foresee: and there is nothing for everyone to hang around them. But this is where Kai's levitation potions come in handy.
The entrance to the tower is from the north side. Go through the door with the inscription "Hall of Onynx", immediately after the door to the right there will be a staircase, and behind it is the Fir Hall. Look up; that's why they gave you the second potion...
They flew upstairs. Divayth Fir lives there. Give him an artifact from Kai (just give it) and ask about the punishment of the gods, a disease called corprus. He will say that other illnesses are not terrible for patients with corprus, just like the Nerevarine himself ... hm. Assure him that he can fulfill the prophecy, and he will send you to the corprusarium for some slippers of Yagrum Bagarn, and then you will receive a healing potion.
Return to the Oninx Hall, from there down the stairs, at the intersection of the corridors - to the right. Here you are in the corps. Cheerful spectacle, isn't it?
Your main task is not to enter into a fight with anyone here. Yagrum Bagarn is a type with spider legs. He will give you the shoes you are looking for without any problems. Divayt Fir in response will share the potion with the condition: take it right here.
Phew, cured. And immunity, by the way, was preserved!
Back to Sadrith Mora, and via Mages Guild transport home to Kai. Here we are waiting for: a new rank, money, magic shirt and pants, and also - Kai's ring. The fact is that our boss is leaving for the capital. The house and the rest are left to us. At parting, we will receive instructions on what to do next.
In principle, we already know that all the troubles come from the vile type of Dagoth Ur. But before we fight him, we still have a long way to go.
Lost Prophecies
And what about the book that the ashtrays have been talking about for so long? Mera Milo should have found out about her; I hope you haven't forgotten the way to it yet. However, she is being followed, so you will have to look for her private apartments. They are locked, but Mera hopes that you will not be shy and pick the lock. There is a message left for you on the dresser with the code "Amaya". Take the potions from the chest of drawers.
Mera went to the Ministry of Truth to visit the Inquisitor. Follow her with the Scrolls of Divine Intervention. The Ministry is a rock above the temple canton, so freshly stolen potions will come in handy to get there.
Talk to Alvela Saram: he will give you the key and tell you where to find Meru Milo. It is recommended to travel around the ministry discreetly, otherwise you will have to deal with the guards. Measure, as you understand, is locked up. Get to her cell and say that you brought the saving scrolls with you. One for you, one for her; meet in Holamain.
She will send you to a certain Blatt Hater in Port Blackheart and give you the original password: "I want to go fishing." Monk Vevrana will show you the entrance. Here is Holamain; Gilvas Barelo has the book you need. Along the way, get a couple more samples of Morrowind literature.
With the prophecies in hand, go back to Nibani Maesa. Now you will fulfill your destiny under her strict guidance.
Trial Three: Moon, Star, and Nerevarine Companions
Ask Nibani about "her decision". Here it turns out that you have passed the first two tests, and now must pass the third. Follow him to Sul-Matuul.
What is the third test? First you need to prove that you are worthy of it. Bring a shield of shadow, a cup with the sign of the house of Dagoth, and drops of corprus from Kogorun.
From the ashtray camp go south to the very mountains, turn east at the foot. Pass Falasmarion, at the crossroads go east. On the left will be Kogorun.
In its southeast corner, under the sign "Eye of Pollock", fight Dagoth Gearer, where you will get a cup. In the urn by the door, get the drops. Now exit, go to the Fisto Hall and from there to the Maki Hall. Straight through the hall you will reach a large room, where the left corridor will lead to the lower floor to the locked door of the Nabit Stream. Go around it on the left, find the tunnel. Finally, you will reach the door with the sign of the Wounded Heart. Come in. At the crossroads - right, then right again. Phew. With a shield, and not at all on a shield, we return to Sul-Matuul.
Now you get a riddle from him. Bring de Nibani the moon and the star.
You need the Cave of the Incarnation. This is to the east of the camp, go along the coast to the mountains. In the mountains, turn south (sign: two pointed rocks on the side). Option: Return to Sadrin Mora, from there take a boat to Tel Arunn, and from Tel Arunn to Tel Mora. To the west, find Tel Vos and fly over the mountains using levitation.
You can enter the cave only between 6 am and 6 pm. There you take the star and the moon and watch a cartoon about what you have to do. By the way, you can talk with the failed Nerevarine (well, you didn’t think that you were the only one so smart?) and get a lot of useful things from them.
So, there are seven tests. What does Nibani have to say about them other than the fact that the third test is passed?
You will know what the fourth and fifth are. In the fourth, you will have to unite the great Houses of the dark elves: Redoran, Hlaalu, Telvanni. Each of them must recognize you as a Hortator.
In the fifth, you will have to deal with the no less unnatural unification of the four tribes of ashtrays: Urshulaki, Ahemmuza, Zainab and Erabenimsum. They, in turn, must recognize you as the true Nerevarine.
You can complete these tasks in any order you choose.
Fourth Trial: Three Great Houses
Redoran
Let's start with House Redoran, famous for its warriors. In the mansions quarter of the city of Ald-Run, find the Sarethi Mansion (on the west of the upper level). The red-coated Athin Sarethi will agree to proclaim you the Mentor and whatever else you want if you save his son.
For this, you don’t even have to go to some wilderness: the son is nearby, in the Venim mansion. Find the key and note on the bench. Either steal the key or pick the lock - whichever is easier for you. Lock - level 50. The door to open is hidden behind a tapestry.
Call the unlucky Sarethi Jr. with you. The guards are attacking you, you have to fight or flee. The main thing: do not accidentally kill Bolvin, you will have to do this later. Everything, Atin - for you.
With other advisors, everything is much simpler. They don't seem to care who they vote for. We need to visit the mansions of Arobar, Garisa Lletri, Barara Morvayn, Hlaren Ramoren - and finally Bolvin Venim.
Bolvin Venim seems to be a little offended by us and challenges us to a duel. Is it a good thing? But prepare well before entering the arena.
By the way, if you rob his body after the battle, no one will object.
Now return to Athin and he will confirm that you have been proclaimed a Mentor.
Telvanni
Telvanni headquarters - the city of Tel Vos. The easiest way is to take a tick from Ald-Run to Huul, and from there sail with a transfer to Dagon Fel and Tel Mora to Vos. From Vos to Tel Vos not far (road to the northwest).
Telvanni are all magicians, and to communicate with them, stock up on means of levitation. Making stairs is beneath their dignity.
So, Telvanni advisors.
You will have to seduce the drath if you are a man; to a woman, out of class solidarity, she will give her vote just like that. Arion doesn't need anything from you either. Terama can be talked to if her Speech is strong enough, but if not, she will have to be killed, which is a shame. Baladas and Neloth won't be particularly roaming around and will calmly vote for whom they say.
Gothren will play for time. They say that the truly wise can wait for a positive decision from him. I recommend to everyone else to slaughter him for tediousness; I don't think anyone will judge us for this. But just let him attack first (cheat him properly).
Phew. We return to Arion, we receive confirmation of our prowess.
Hlaalu
These guys know exactly which side of the sandwich the butter is on. Pay them, pay and pay again. Their votes are worth almost three and a half thousand in total.
The Hlaalu dwell in the glorious city of Vivec.
Crassius Curio in the Foreign Quarter, Hlaalu Section, costs 1000 gold. Yngling Half Troll (Canton of St. Olms, Yngling Manor) will cost as much as two thousand, if you do not wish to take the trouble of killing him. Drum Bero (Haunted-Manor on the same square, behind a locked door) will vote for free. Velanda (Telvanni canton, Omari Manor) - similarly.
Orvas Dren (lives on his own plantation north of Vivec) is not sold for money. You can chat him up with your Speech (up to 90 reputation) and convince him that you are going to... protect Morrowind from the Empire. If you tell him that you want peace in Morrowind, he will attack you and you can kill him. Finally, you can take his key (on the first floor, on the table), kill the guards and open the locked chest with a trap; there, in addition to all sorts of valuables, there is a wonderful compromising evidence on our steadfast adviser. It will serve to his conviction in the best possible way.
Nivena is found near Dren, north of his plantation. Her estate is on the road to Suran. She doesn't need money.
Having enlisted the support of all this brethren, return to Crassius and receive the title of Mentor and mentor's belt.
Test Five: Ash Tribes
Here we have to unite the four tribes of ashtrays: Urshulaki, Ahemmuza, Zainab and Erabenimsum, convincing them that you are the true Nerevarine. Many prefer to complete this mission before the previous one, since at the time of receiving them you are already at Ursulaka.
Urshulaki
Sul-Matuul is easy to convince, since he already knows you well. Tell him only about the need (need) and duty (duty). He will recognize you as Nerevarine without much torment and will give you the Tooth of Ursulaka as a sign of this. Nibani will tell you where to look for other tribes.
Ahemmuza
Find their camp here. Take the northern route from Urshulaki, follow the coast west to Huul (you may have to swim). Talmeni Drethan at the port will take you to Dagon Fel. Hema will take you from there to Tel Mora, and from there Thonas Telvanni to Vos. Go north along the coast until it starts to turn sharply; not far from here to the southwest is the desired camp.
First of all, you need to find, of course, the Mudra yurt (north-west of the camp). Sinnammu Mirpal will ask you to talk first with Kausi, Dutadalk and Yenammu. Look for the Kausi and Dutadalka yurts. They don't require anything special from you.
Sinnammu wants the ashtrays to be able to migrate to Ald Daedroth safely.
Ald Daedroth - directly north of the camp, and you have to swim there, and it's long and nasty. At the temple, you will meet Drores Arvel, who is involved in a small brawl and will cope without your help. Tell him you've come to rob the temple. Come in. You will be attacked by guards (one of them with a paralyzing sword). Go to the inner part of the temple, kill the golden saint and the dremora. After that, return to Ahemmusa and arrange a Wise excursion to Ald Daedroth. She will agree to recognize you as the Nerevarine and give you the stone of Ahemmus.
Zainab
Zainab live near Ahemmus, go from their camp to the southwest. On the way you will come across the tomb of Nerano; clear it and kill the vampire. At the crossroads, go southeast, at the next one, choose southeast again, then south, and south again. Here is the parking lot of Zainab.
Look for a yurt... who do you think? Wise, of course. She will send you to Ash Khan Kaushad. He will have to be bribed to support your claims. Besides, he will want the death of the vampire Calvario... how fortunate that you have already laid to rest this unpleasant gentleman. But this is not enough for the greedy khan: give him also ... a wife. Yes, not anyhow, but Telvanni. Sunnammu can advise you on Khan's tastes; what you need can be bought from Savil Imain at the slave market in Tel Arunn and pass off as a full-blooded Telvan woman.
Tel Arunn is southeast of the Zainab camp, but first you should stock up in the city of Vos with funds to mislead the khan. For example: Telvanian musk (in the Arelet pharmacy) and special (exquisite) shirt, skirt, shoes (Eleynan). Now look for Savil Imain, tell her about special clothes, ask for something special. In exchange, she will demand musk and 1200 gold (ehma!). Retrieve Slave Faluru Llerva and deliver her to Kushad. He will be overjoyed and proclaim you whatever you want.
Erabenimsum
After you manage to pronounce this name, no trials will frighten you anymore, right?
Sail to Sadrith Mora and from there to Tel Fir. A tribe with an obscene name, where we were sent, in the southwest.
The local Wise has a long list of people from whom she would like to rid the world. Ulat-Pal, Ahaz, Ranabi, Ashnu-Ahkhe. They all live nearby, have fun. Do not forget to rob the bodies (although I know you, what about what, but no one needs to be reminded of this!). Now we need to convince a certain An-Ammu to become the next Ash Khan. Chat with him and give the clothes taken from the dead, the fiery heart and the axe. If you are especially tempted in verbiage, you can convince him without gifts.
After that, you will be proclaimed Nerevarine here and will be given another iconic item.
high priest
The High Priest, Lord Toler Saroni, wishes to see you. It's in Vivec, in the temple canton. Danso Indules (in front of the temple) will order to let you in. Pass the Hall of Wisdom and the Hall of Justice, go up the stairs and pick the lock in High Fanes. Talk about church doctrine with the high priest. He will arrange a meeting with Lord Vivek and give you the key to his church, as well as to the lock you just picked.
Talk to Vivek, accept a magical item from him and ask how to destroy Dagoth Ur. You receive an action plan; it remains to take a ticket for a tick and depart for Balmora.
Red Mountain and the Seven Vampires
Do you like to cut vampires, gentlemen? Retail, wholesale and by battalion?
South of Balmora, follow the east road to the path to Caldera. Walk along it just a little bit - and climb the hill. Cross the bridge, go down - and you will reach the altar of the Daedra. Here is the Ghost Gate. In the towers of Dawn and Dusk, replenish your equipment.
The map of the Red Mountain will not hurt you very much. It can be obtained from priests. If everything is ready, go. Flip the switches to open the Mountain.
You don't have to kill the first vampire. But killing is better. It will be easier to deal with Dagoth Ur.
Dagoth Uthol lives in the Kogorun Cave, east of Veminal. It's right at the entrance, you won't have to look for a long time. (Some choose to kill him as early as the third trial.) The easiest way is to lure him somewhere where he gets stuck and poke him with arrows, but you can do it in a fair fight. Don't forget to remove the belt from your body.
Dagoth Endus - the second - is also an optional program. Go north of the Gate, at the mines of Yassu, turn northwest. At the wall - to the north. This is how you find Endusal. Vampire - in the room on the left, kill and rob him.
Dagoth Tureinul can also be pardoned, but not necessary. His lair is northeast of Dagoth Ur's stronghold. He himself is in the library.
Dagoth Arainis does not live in the mountains at all, but near Berandas. You can't kill him either. Get to Ald-Run, from there with a tick to Gnisis, swim across the river to the northeast - and you will fall into Berandas. To the east of it is a place called Mamaka, the Temple of Awakening, and further on, the Temple of Black Hope. That's where he, my dear, sits.
With Dagoth Ordos, the necessary part of the task begins. He lives at the Dwemer academy in Ordosal. Take the amulet and key. Climb the stairs and find an item called The Keening.
Dagoth Vemin is found near Dagoth Tureynul, in the fortress.
You will meet Dagoth Gilvot on the way to Dagoth Ur, on the north side of his citadel. Go down into the crater and you will see a door with a steel button (like the one in the Dwemer dungeon). Nearby is a lever that must be turned to open the door. Go down the stairs, go around the hole in the floor and jump into the next one. Go through two doors, turn right before the third one. There you will see the seventh vampire. Kill him and move on.
Dagoth Ur
Here he is, Dagoth Ur, about whom the Bolsheviks, imperial spies and other ashtrays have been talking for so long.
Take a good rest before entering his abode and conjure yourself everything that is more or less useful that you have.
Talk to him. If you have Wraithgaurd (from Lord Vivec), Keening (from Dagoth Ordos) and Sunder (from Dagoth Vemin), fight him or he won't attack you. When you defeat him, he will disappear and the door will open; before entering, rest again and clean yourself up. Equip Wraithgaurd and Sunder (in that order, otherwise you won't get hurt). Prepare a potion of levitation, or at least slow fall. Instead of a weapon, take Keening and hit the heart on the floor five times. Do not pay attention to enemies, except for a huge robot, which you will have to fly or jump to. Hit the heart with Sunder. Change weapons again to Keening, and hit the heart five times. After that, the adversaries will disappear, run across the bridge and make sure that the robot has disappeared too. On the way back, meet Azura, watch the cartoon and get the ring.
Dagoth Ur's lair has been cleared.
Actually, that's all: the task is completed, general splendor has come. But the game does not end, and you can fully complete side tasks and provide your hero with a place under the hot Morrowind sun.
Guild Quests
I will describe the tasks of several guilds that seemed to me more interesting than others. In principle, there is nothing particularly difficult in these missions, and most of them are completed in one breath.
Since these tasks are a deeply optional thing, I will state them a little more concisely. Besides, I can't guarantee that I haven't missed any of them even in the guilds I've described.
There are already a lot of them!
Mages Guild
Ranked missions
To obtain the rank of a wizard (the eighth stage of initiation), you must acquire a wizard's staff. This toy is not cheap - 5000 gold. For that kind of money, you can (see above) buy the votes of the entire house of Hlaalu! However, it can also be obtained for nothing if you find and kill Anirna, an apostate sorceress who lives in the caves of Sud, west of Dagon Fel. Daedroth live there, hungry and skeletons with bows.
To become the head of the guild, it is necessary to replace Trebonius Artorius in this post. However, this gentleman does not take his post too seriously. The necessary arguments will be provided to you by Mr. Skink after you fulfill his instructions.
|
Skills: Hex, Destruction, Transformation, Illusion, Mysticism, Alchemy.
Ayira's Quests
If you join a guild in Balmora, then your first contact in the guild will be Ayira. She will instruct you to get rare mushrooms for her, without which she cannot see the title of apprentice. Namely: luminous russula, violet coprinus, bungler's bane and hypha facia. By the way, these are really good mushrooms (see table of alchemical reagents).
Here's what they look like:
|


In the hills southwest of Balmora all this joy grows. Seek and you will find.
Further, Ayira's rival - Galbedir - also wants to become an apprentice, and we must ... no, not kill her, you guessed it, but just slip her a fake soul stone. It's elementary: just place a pebble on Galbedir's table along with the others.
Why, oh why are sorcerers taught botany? This time Ayira wishes to receive a bouquet of rare flowers. Also, of course, useful as reagents. Namely: gold kanet, stoneflower petals, willow anther and heather. Portraits of wanted plants:
|


This time, take a walk across the bridge in the southeast of the city - and collect the desired herbs to your heart's content. For this feat, in addition to deep moral satisfaction, you will receive as a reward a potion of restoration of magic and great, great gratitude from Ayira.
Now deliver the pottery to Ayira from Trader Ra-virra. The price of a bowl is two coins. You will not overwork, extracting it. The merchant lives next door.
Galbedir, offended by us, strikes back: she steals from Ayira the laboratory work about the flowers we got. Find a scoundrel and cajole her for a long time by any method available to you until she treats you better than you deserve (reputation is about 70). The papers live under a closet in her bedroom and in a bag of reagents on the first floor. Ayira will love you even more and bestow potions of Fire Shield, Cold Shield and Lightning Shield.
Upon reaching the sixth rank, Ayira will tell you about the staff of Magnus. This is not even a task as such, but simply useful information about a useful little thing. The staff lies in the cave of Assu, which is on the slope of Mount Kand northwest of Molag Mar, at the southeastern end of the island. The battle in the cave is going to be serious: Daedra, atronachs, two mages. One of them is level 20 and carries the staff you are looking for. The Staff of Magnus, in addition to being a decent weapon, absorbs magic and regenerates your health.
At the next step, you are offered a similar "task" - the search for the Wizard's ring. Ringlet lives in Ashirbadon Cave, on an island east of Bal Fell Ruins, directly east of Vivec. The cave is quite small, but the atronachs, Dremora, Daedroth and magicians are worthy of all respect. The ring is worn by Vindamea Dretan. In the ring - a reflection of magic and strengthening of speed.
SECOND PAGE
Quests from Ranis Atris
This series of tasks begins when you reach the third rank - apprentice.
First task: Recruit a Telvanni named Llarer Berelot in Sulipund. This requires a considerable Speech skill, otherwise Llarer will have to be killed. Sulipund is located north of the fortress of Marandas. Reward - four potions of magic recovery and +10 reputation.
Next, the dues should be collected from a lady named Manwe from Punabi. She owes the guild 2000 Septims. Likewise: if you don't convince her, you'll have to kill her. She lives near Llarer. With a reputation of 70, you will convince her to give the money, and you will receive half of the proceeds as a reward from Ranis.
The illegal teacher at the South Wall club is the Argonian you saw when you were looking for Kai Cosades - trying to teach Restoration without a license. He needs to express the general "fe". Similarly: chat with him until the result is achieved, or kill him.
Next, escort a certain Itermerel to Pelagiad. And also copy his notes for Ranis. Don't take your eyes off him until you reach your goal. After arriving at the desired tavern, he will lag behind you; talk to him and take the papers.
In Maar, a certain Tashpi Ashibael engaged in unholy necromancy. Ranis orders to kill the stubborn creature. She lives far to the north, beyond Ald-Run. Ticks go there. If you ask Tashpi about necromancy, she will pretend to be surprised at first, but it is worth mentioning Ranis - and everything will fall into place. Tashpi simply refuses to join the guild and works as a free healer. There are two options: still kill or agree that Tashpi will disappear, and Ranis will receive a report on her death. From Ranis you will receive two very powerful scrolls.
There is evidence that a Telvannian spy has infiltrated the guild. You need to visit the guild buildings in Vivec, Ald-Rune and Sadrith Mora and find a spy. This can be done quickly thanks to the guild transport - teleportation. You will find the trace only in Vivec, where Trebonius Artorius will categorically reject the rumors about spies and send you to his adviser Tiram, who "does it." Ask him more about Thiram and you'll find out everything you need to know. A reward will follow from Ranis - two scrolls and a Daedric dagger.
There is also an alternative solution: accuse Ranis of espionage before Artorius (if you didn't kill Tashpi).
Quests from Edwinna Elbert Atris
A rare book - "Chronicles of Neuleft" - for Edwinna can simply be bought in a Vivec store. Edwinna will give her money.
Bringing a potion from the Skink from Sadrith Mora is no more difficult. We jump into the teleporter, get the potion, return.
The situation is a little more complicated with Edwinna's new need - a book called Himarvamidium. Sirilonwe has a copy, and Edwinna, in general, does not hope that Sirilonwe will give it up. Simply, you must steal the book and not get caught, otherwise you will be thrown out of the guild in disgrace. She has the book under lock and key (level 30). If you unlock the lock with the door closed, you won't get caught. But don't talk to the victim while you have the stolen goods. After a while, Edwinna will copy everything she needs, and the book will have to be returned; it is not difficult, and if you wish, you can simply give it to Sirilonwe. The reward is two amulets of divine intervention and Almsivi's intervention.
Now you are sent to deal with some mess in Hulin's house, in Maar Gan. The house is in the east, outside the city. A lonely monster wanders there and a sad student sits, who managed to summon the monster. Holding on - no. Problems - no.
Desperately need a Dwemer pipe. She wants you to look for her not just anywhere but in the ruins with the poetic name Arkngthunch-Sturdumtz (sing it to your favorite tune). But this is completely superfluous: there are more than enough such pipes in all sorts of ruins, they simply lie there in chests. You probably already have one; give it to the customer, and that's it.
Why not look for Edwinna's colleague, a certain Senilius Cadius, in the Dwemer ruins (they were given these ruins!) Neulefting? For a long time he has not written to a dear colleague. Ruins - northeast of Suran. Senilius (which means "old man" in Latin) and his daughter got lost because they lost their guide. And why in the guild of magicians they teach botany, but they don’t teach you to bypass the ruins according to the rule of the right hand?! We need to find a guide. There are three handles in the northeast part of the Trial of Image, and the east one opens the door to the lower levels (the rest are traps). There lies the carcass of the deceased guide and there are two Dwemer robots. You can run away from them. But grab the Hanging Gardens book from the same room.
Our restless gnome scientist (remember who the "dwemer" are? None other than the former owners of Morrowind - the dwarves) wants a map of another Dwemer ruins - Mzuleft, southwest of the northern city of Dagon Fel. The ruins are guarded by orcs, but the cards are on the shelf to the right of the entrance, and you can quickly grab them without getting into a fight. But even in this picturesque place you can find the book "Egg of Time", on the table, next to a couple of orcs. If you get her too, Edwinna will recommend that you talk to an old acquaintance: Gasfat from the military guild.
Edwinn's book... will not understand. Haven't grown up yet.
Skink's Requests from Sadrith Mora
The Skink will be ready to give the first task immediately after completing the mission from Edwinna, the one where you ran to him for a potion. It is necessary to conduct a certain scientist from the club to the ship. There is nothing to go there - the club is located across the bridge from the fort.
The second task is more serious: to find the book "Vampires of Vvardenfell". The first volume can be bought, the second is a rarity; Guess which one Skink needs? But this part is also under the ban of the Church. You can still buy it in Jobasha's Vivec shop... for a modest sum of four hundred coins. Alternative: try to steal it from the secret library of the Hall of Justice or take it with a fight from the lair of some vampire. Skink will pay a whole thousand coins for it, so the investment is justified.
Now the Skink wants to meet with the Wise of one of the ashen tribes - Urshulaki, Zainab, Erabenimsun or Ahemmuza. It is with Ahemmusa that he proposes to begin. We have already described the location of these parking lots in the main tasks section. The wise Sinnammu refuses the rendezvous, but offers to send instead her apprentice - Minabibi, who lives in ... a crypt to the west of the camp. Minabibi doesn't mind, but you must first kill some kind of ghost for her, and then ask Sinnammu's permission on her behalf ("Did you ask those in front? And what did they say?"). Luckily, Skink will be fine with a replacement. He will reward you for your work with a charmed ring.
Skink, like Ranis, also cares about what they call the "good name" of the guild. A certain Telura Ulver is said to be practicing necromancy in Shale, north of Hla Oad and the Daedric ruins. This time, the venerable mage seems to have guessed right, because Telura will attack you as soon as she appears. Deal with it and return.
Upon reaching the rank of a full wizard (level 7), the Skink deems you worthy to help him in his research: to get the soul of an ashen ghoul for him. To which you are given two scrolls of soul traps and two stones. He suggests looking in the cave of the Sixth House, west of Sadrith Mor. The ghoul is really there. Most importantly, do not forget to read the soul trap, otherwise you will be looking for another suitable ghoul for a long time. The second stone may remain as a reward.
The next book about vampires Skink is interested in is The Notes of Galur Ritari, which tells how someone became a vampire but was healed. Jobasha from the Vivec store will tell you that you can look for it in the secret library of the Hall of Justice, in Red Mountain or in Galom Deus. The easiest way, of course, is to get to the secret library, but there is a good castle (level 75), and it is not recommended to get caught. However, in Krasnaya Gora it is by no means easier.
Quests Trebonius Artorius
Trebonius Artorius wants to know nothing less than the secret of the disappearance of the Dwemer Dwarves. How to recognize her? He has no ideas for this. Let Edwinna tell you, is she wasting the resources of the guild on digging up the Dwemer ruins for nothing?
If you have carefully completed her previous assignments, then you have three books: Hanging Gardens, The Egg of Time, and Divine Metaphysics. In addition, you probably already talked with Gasfat and Senilius, and one of them suggested that the first of them is the key to the other two. The only trouble is that "the last page of the detective was written in Arabic": you need an expert in Old Elvish. Edwinna or someone else will explain that the best specialist is Yagrum Bagarn, already familiar to us from the main storyline. The Telvanian Baladas from the tower in Gnisis will do. After one of them translates the book for you, return to Trebonius and receive a reward.
After completing the main storyline, the guild gives one more mission: to destroy all Telvanni advisors. Where they live - you know from the main task. All of them, of course, are well guarded. And, characteristically, it is completely incomprehensible what kind of Trebonius needed this ... But as a reward, he is ready to give his own staff (when hit by it, the victim receives vulnerability to fire and shock, as well as damage from shock and fire) and a necromantic amulet with a bunch of permanent effects .
Assassin's Guild Morag Tong
This elite establishment is available exclusively to dark elves. For everyone else, alas.
|
Skills: Illusion, Stealth, Acrobatics, Light Armor, Short Blades, Marksmanship
Joining the Morag Tong
First of all, this guild must be found: it does not shout about itself at every corner. Its headquarters is in Vivec, in the canton of the Arena. You can find someone who will tell you where he is, or you can independently find a locked hatch behind the boxes under the Arena, in the storage area. Inside, find and talk to Eno Hlaalu.
He will ask you to show what you are capable of. And you are capable of killing Feruren Oran, in the club of the Elven Peoples, in the Hlaalu canton of the city of Vivec. Eno will even give you a paper, according to which you ... will receive a reward from the guards for the murder. Report to Eno.
Work days
The following missions can be obtained from at least three locations: in Ald-Run, in Balmora and Sadrith Mora, in the guild halls.
So you should kill:
Odaishah Yasalmibaal, in a yurt on an island northwest of Tel Fir;
Toris Saren, in his own mansion in Redoran Square in Vivec;
Sarayn Sadusa, in the Zayntirari Cave, north of the Erabenimsum tribe camp (see story missions), led by his bandits;
Idroso Vendu and Etal Selota in an inn near Telvanni Square in Vivec;
Gurila Retheran in the Golden Flowers Club, Rendoran Canton, Vivec (don't forget to pick up a very useful item from him);
Galasu Uwain, Hlaalu Treasury, Vivec;
Mavona Drenima, Telvanni Canton, Vivec (strong magician, attacks first);
Tirera Belvain, Shar's Dungeon, southwest coast of Dagon Fel;
Matina Bemisa, a gang of thieves in the Hlaalu dungeon, Vivec (three thieves will intercede for the chieftain and posthumously share with us very decent booty);
Brilnozu Laris, Chloramaren fortress west of Balmora;
Navila and Ranesa Ienith at Villa Dren (they are experienced assassins with paralyzing daggers; the thieves guild also “orders” them, so you can complete this mission for two clients at once).
After you deal with Dagoth Ur and become the head of the guild, you will receive a few more orders:
Larrius Varro, head of the Imperial Legion, Lunarmoth Fort Barracks (very strong opponent with great weapons);
Baladas Demnevanni, adviser to Telvanni from Gnisis, a strong magician, by the way, somehow interfered with Trebonius Artorius from the guild of magicians;
Dram Bero, adviser from Hlaalu in Vivec (if he is killed, a message about the violation of the prophecy appears - but after the death of Dagoth Ur it does not matter anymore);
Terana, another Telvanni advisor (possibly Terana is no longer alive as a result of one of the main story quests).
Legacy of Sanguin
During the game, you come across several items that were once made by the Daedra Sanguin. There are twenty-seven such things in total. Sanguin made them for Mephala, head of the Morag Tong. Eno Hlaalu can tell about them and instruct to find them all (more precisely, 26 of them - the last one is owned by Eno himself). Most of the rest are in the possession of hostile clan members or equally hostile cultists.
Here is a list of these items (to avoid confusion, I give the name in the original language):
Amulet of Sanguine Enterprise: owned by Eno Hlaal;
Amulet of Sanguine Glib Speech: Possessed by the innocent Shoterra of the city of Huul;
Amulet of Sanguine Nimble Armor, Ring of Sanguine Fluid Evasion, Glove of Sanguine Swift Blade: owned by the North of Magic, a powerful sorcerer in Ald Soth Chapel, northeast of Vivec;
Belt of Sanguine Balanced Armor, Belt of Sanguine Deep Biting: owned by Relas Arotan in Assernerairen Chapel in St. Olms, in Vivec;
Belt of Sanguine Hewing, Belt of Sanguine Sureflight: at Durr Maria in the same chapel;
Belt of Sanguine Denial: From Movis Daris at the Mages Guild of Ald-Rune;
Belt of Sanguine Fleetness: Found by Hrordis at the Midway Inn in Pelagiad;
Belt of Sanguine Impaling Thrust: owned by Gluronk gra-Shula, in the tavern at the gates of Sadrith Mora (another, alas, quite peaceful owner of the item from Sanguin);
Belt of Sanguine Martial Craft: by Karekalmo in Ashalmimilkal Chapel, west of Balmora and north of Hla Oad;
Belt of Sanguine Smiting: Domba, Chapel of Ald Daedroth, between Camp Ahemmusa and Dagon Fel;
Belt of Sanguine Stolid Armor: Mindeli Saren, Yasammidan Chapel, northwest of Gnisis;
Glove of Sanguine Horny Fist: Guril Retheran, lower floor of the Golden Flower Club, Vivec, Redoran Canton (in another task, the Morag Tong asks you to kill him);
Glove of Sanguine Safekeeping: Inganar, Ularradallaku Chapel, northeast of Ald-Run;
Ring of Sanguine Golden Wisdom: Talis Veran, Ebernanith Chapel, on the north bank of Vvardenfell, almost in the middle;
Ring of Sanguine Green Wisdom: Crooked Tooth, Chapel of Ald Daedroth, between Camp Ahemmusa and Dagon Fel;
Ring of Sanguine Red Wisdom, Ring of Sanguine Transcendance, Ring of Sanguine Transfiguring: All three are owned by Llandral Wahram, Ald-Soth Chapel, northeast of Vivec;
Ring of Sanguine Silver Wisdom: Earmil, Assurnabitashpi Chapel, off the coast east of Khuul City (note that the chapel has two entrances and two halls);
Ring of Sanguine Sublime Wisdom: Anel Rethelas, in the already mentioned Yasammidan chapel;
Ring of Sanguine Unseen Wisdom: Erundil, Fortress Indoranyon, north of Tel Arun;
Shoes of Sanguine Leaping: on Khajiit Dro-Zaimar in St. Delin Canton, Vivec;
Shoes of Sanguine Stalking: Towashi Alen, Assarnatamat Chapel, northeast of Balmora and southeast of Caldera, in the Ashlands.
For all this torment, you will get a cheap spell that is not mistaken and combines the effects of a chameleon, an increase in attack and a short blade. Nowhere else has anyone been able to learn how to strengthen a skill, so this spell is completely unique.
Other tasks
If you ask Eno about special tasks, he will find something specific for you. For example - to make contact with the Dark Brotherhood, thereby owning many of the magical things mentioned above. The Brotherhood once spun off from the Morag Tong and is now its mortal enemy. Vivec Hexmaster Miun-Jay can connect you with the Khajiit Tsrazami in the Vivec Bazaar Canton.
After some time, you will be asked to convince a member of the Brotherhood, a certain Movis Daris, to join the Morag Tong (unless, of course, he has already fallen victim to the fact that he got one of Sanguin's items). Where to find it - see above. Similarly, an order will follow for another gentleman from the list - Durra Maria. Perhaps it is worth combining business with pleasure here ... The same applies to the North of Magic.
Having reached the penultimate rank, you may want to lead a guild. Eno Hlaalu will say that he is not averse to resigning, but in general the custom on this matter is unambiguous: the former head of the guild must die. You have the option to let Eno go to rest or fight him. Please note that if you have not yet completed the task with Sanguin's things, then you must complete it before becoming the head of the guild - or Sanguin's mission will automatically fail.
Warrior Guild
Warrior Guild quests conflict heavily with missions from the Thieves' Community. Soon enough, their activities become hostile to each other. Therefore, it makes no sense to make a career in both guilds at once. Many tasks will be inaccessible, because you have already acted on the opposite side of the conflict. It would seem that it is quite natural for a thief to play on two sides, but there are mechanical limitations here: you can play, but many actions simply will not appear within reach.
The warrior guild is deeply law-abiding, and you will regularly need to help local guards and lords. But with all this, something strange nestled in its top ...
|
Eydis the Fireeye
The chief of the Balmora branch of the guild, first of all, will offer to destroy ... cave rats in the house of Drarain Telas. Drarain will tell you that she has a rat in the bedroom and two more in the attic, and will give the key to the attic. Dealing with them is no easy task.
Next, you should take care of two egg stealers. A certain Sevilo Otan and Dainila Valas, fired egg diggers, took up the theft. They are in the mine and attack you first; do not try to attack the first miners you meet.
1 2 All
Epic hangover stories, murder investigations, dungeon crawls and Lovecraftian villages. Here are some of the best quests in Elder Scrolls history.
The Elder Scrolls series has given us a lot of great quests, which are deservedly considered the best in the RPG genre. Of course, we love Fallout, Knights of the Old Republic, The Witcher and many other games of the genre, but Elder Scrolls quests have their own unique charm.
Years ago, the creative team at Bethesda decided it was time to get rid of the tired “go there, find it, and come back” formula that RPG quests used to build, and start using all the possibilities of the open world for something ... new.
Since then, every new game in the Elder Scrolls franchise has featured at least one quest that was so inventive that it almost felt like the entire game was created solely for that quest. And this thought did not let go until you stumbled upon an even more impressive quest.
But which of them can be called the best? What missions have allowed us to immerse ourselves in the open-world RPG and enjoy a lot of little things in it, along the way, admiring the convincingly delivered story?
The best quests in Elder Scrolls history need to be more than just epic, inventive, and memorable. They have to be near perfect to justify the dozens of hours you put into this gaming universe.
We will talk about Arena and Daggerfall some other time, but for now we present to your attention the best quests in the history of the Elders Scrolls.
25. Cleansing - Oblivion
Lucien Lachance, representative of the Dark Brotherhood, has decided to ask you for a favor. As it turned out, members of the Brotherhood suspect that a spy was among them. And since you joined the ranks of the faction after the first evidence of a spy appeared, you remain above suspicion. What's more, you're tasked with eliminating all assassins to make sure the spy doesn't get away alive.
To be honest, this entire list could have consisted entirely of Dark Brotherhood quests from Oblivion. However, this particular quest stands out from the rest, not only because you have to kill characters with whom you have worked side by side throughout many tasks, but also because there are countless ways to kill them.
Eliminate them with your bare hands, use poisoned apples, summon darkspawn and methodically cross off targets from your list - this quest contains the variety for which we love the Dark Brotherhood quests so much, and a very unexpected twist in this excellent storyline.
24. Decapitate the Thieves Guild/Kill the Master Thief - Morrowind

All in all, Morrowind quests aren't the best Elder Scrolls has to offer, but there are plenty of hidden gems in this classic RPG. One of them is a quest that begins with the request of the head of the Fighters Guild to kill the leaders of the Thieves Guild.
The task is interesting primarily because you can get it even if you are already a member of the Thieves Guild. In addition, we very rarely see direct faction conflicts in the Elder Scrolls series, and therefore the quest can be confusing at first. However, this is one of those missions that makes the game worlds more compelling and forces the player to make some serious decisions while getting into the role of their character.
The quest itself, as well as various ways to complete it, depending on your connections and preferences, is simply bound to appear in one form or another in future games in the Elder Scrolls series.
23. Ushnar's Nightmare - Shivering Isles

Ushnar gro-Shadborgob is an orc with a bit of a problem. He is terribly afraid of cats, and it just so happens that a Khajiit named Bisha follows him around. Ushnar asks you to make sure Bisha doesn't follow him anymore. And Bisha... Bisha, it turns out, just really loves the dogs that Ushnar got to scare away the cats.
The Shivering Isles expansion is known for its creative quests, and this simple side mission is a prime example. You can easily "fix" the problem by killing a rogue Khajiit, but if you take the time to dig deeper, you'll find that there are several ways to help both characters (or help neither) get what they want.
The best sidequests in the Elder Scrolls draw us in with their unorthodox plots and surprising climaxes. And in this regard, this quest justifies all expectations.
22. Innocence Lost - Skyrim

A little boy is trying to perform a Dark Sacrament to summon members of the Dark Brotherhood and ask them to kill someone. What initially looks like a simple childish misunderstanding of the essence of the ritual turns out to be something much more disturbing.
Innocence Lost is a fairly simple quest with the usual turn-based system, but its genius lies in the moral side of your actions. After the mission leads you to a rather violent orphanage owner, and you start to understand what the main conflict of the quest is, you can start to wonder what role the Dark Brotherhood plays in this world.
Are you really a righteous arbiter of fate, or just an assassin who periodically stumbles upon targets that pose a more serious threat than you think?
21. Shrine of Sheogorath - Oblivion

Present a piece of yarn, lettuce and a small soul stone to the statue of Sheogorath, Prince of Madness, and he will ask you to convince the inhabitants of a small town that the doomsday prophecy is about to be fulfilled? What for? Yes, because it will be fun, that's why!
Sheogorath has long been one of the best characters in Elder Scrolls mythology, and this quest cemented him as the source of the most fun quests in franchise history. Here we have to attract rats with a piece of rare cheese, monitor the population of local sheep and eventually become an unwitting harbinger of a real apocalypse.
And be sure to wait for the explosive finale.
20. Unexpected Journey - Oblivion

The Floating Inn is a hotel ship located in the Imperial City's Waterfront District. At first it seems that this is an interesting, but far from the most essential element of the decor of the largest location in the game. However, if you decide to spend the night on the ship, then the next morning you will find that the tavern has been stolen by pirates.
By itself, the plot already looks pretty good, but the mission has become famous precisely because of the unexpected depth of study. If you decide to kill the pirates, you'll miss out on their entertaining backstory that reveals who they are and why they chose to go to the high seas.
By the way, after this quest, you will probably begin to look suspiciously at other taverns in the Elder Scrolls world.
19. Diplomatic Immunity - Skyrim

After learning that the Thalmor faction may be responsible for the return of dragons to the world of Skyrim, you are given the task of infiltrating the Thalmor ambassador's house and finding the necessary evidence. Under normal circumstances, this would be impossible, however, fortunately for you, the ambassador has just decided to organize a reception, and therefore you have a chance to slip through unnoticed ...
To begin with, it is worth noting the excellent implementation of stealth, as well as a well-staged scene, during which you need to convince one of the guests to distract the owner of the house. Interestingly, depending on your character, the chosen faction and the decisions made earlier, you can convince almost any guest, if, of course, you thoroughly prepare for the task.
The quest itself was done very well, and the episode with the guests is a brilliant example of how you can solve problems using role-playing elements.
18. Ultimate Peace - Shivering Isles
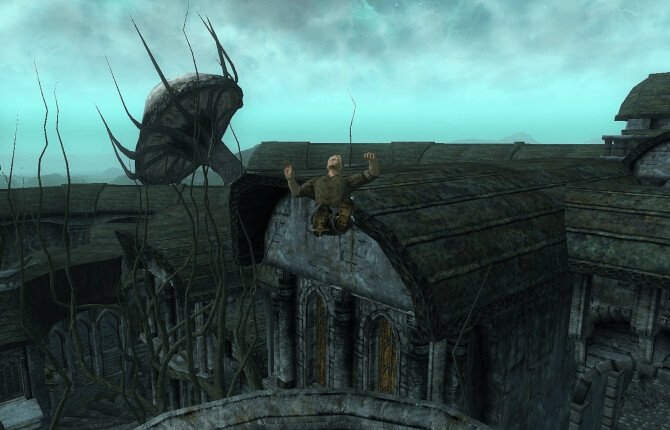
Hirrus Clutumnus is an incredibly annoying NPS that roams the Crucible in New Sheoth. If you decide to attack him, he confesses that he dreams of death. However, he wants to die in a rather extraordinary way.
Before us, perhaps, one of the best examples of black humor in the Elder Scrolls series. The various ways in which Clutumnus' request is granted are surprising to say the least, but the main star of the quest is Hirrus himself and his dark jokes about how badly he wants to die.
He is worth keeping alive just to listen to all the lines in which he lists the various events that occurred during the main storyline of Shivering Isles, and laments that none of them led to his death.
Yes, and the epitaph on Clutumnus's tombstone will read the following: “Hirrus Clutumnus could not fit into this world in any way. But now he fits perfectly into the coffin.
17. Blood on the Snow - Skyrim

The city of Windhelm lives in fear of a serial killer who has managed to escape justice for a long time. After another murder, the inhabitants of the city ask you to find a maniac and make him answer for all the crimes committed.
And although at first this investigation is more like a plot for the CSI: Tamriel series, it eventually turns out to be one of the longest side quests in Skyrim. In order to find the killer, it will be necessary not only to fulfill a number of predetermined conditions. It is likely that you will end up calling an innocent resident a murderer.
And the worst thing is that the consequences of a wrong decision in this quest will sooner or later make you regret your mistakes...
16. Dangerous Arts - Oblivion
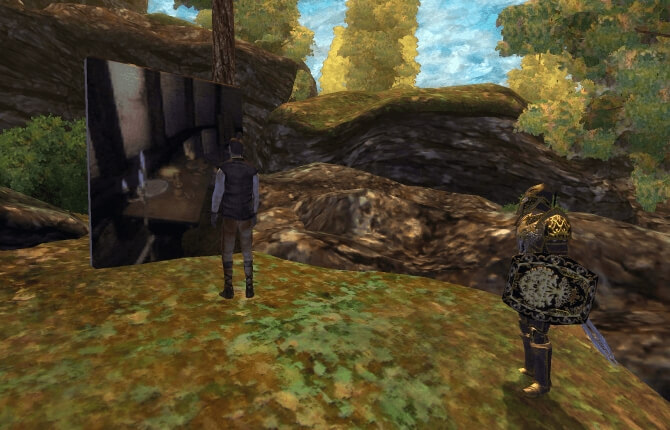
An artist has disappeared in Cheydinhal, and his wife is in sincere bewilderment. She says that he had no secrets, no secret mistresses, and spent all his time in his room with his paintings. A cursory examination of the paintings reveals that one of them looks suspiciously... addictive.
Apparently, the Dangerous Arts quest was created only so that the artists of Oblivion could show their creativity in a hand-drawn world. And it is very difficult not to admire the beauty of the surroundings in this quest, saving the artist from his addictions along the way.
On the other hand, many will surely hate this task because of the most difficult opponents in Oblivion: painted trolls.
15. East Empire Company Colony - Bloodmoon

This is not quite a standard quest, but rather a storyline consisting of a number of small tasks, but we just could not help but include this amazing adventure in this collection.
In Morrowind's Bloodmoon expansion, you have the opportunity to help the East Empire Company build a colony around a resource-rich mine. To do this, you will need to negotiate with suppliers, calm down an old man who loves to fight in pubs, choose political factions that will become part of the colony, and eventually build your own mansion.
Unlike Fallout 4's build mode, which didn't fit into the general RPG gameplay at all, here you have to complete a series of exciting quests to build a colony, and as a reward you can admire the result of your labors.
14. Order of the Virtuous Blood - Oblivion

In the Imperial City, we meet a citizen who tells us about a vampire that roams the world of Cyrodiil. We also learn that the headquarters of the Vampire Hunters Guild is located nearby, and they clearly could use our help. However, after meeting with them, it becomes obvious that far from the most gifted hunters are being recruited into this guild. Moreover, the game unequivocally hints to us that these guys are clearly not hunting for vampires.
This quest is full of literate references to the legendary stories about vampires, and the main emphasis here is on the ambiguity of the actions of vampire hunters. As you complete the task, you gradually wonder if the game is even worth the candle.
This, by the way, is also the first quest to warn Oblivion players that they themselves can become vampires.
13. Call of the Moon - Skyrim

Despite Falkreath being known as the location with the largest graveyard in Skyrim, the recent death has shaken hardened residents to the core. A worker named Sinding literally tore a little girl apart, and a grieving father wants to know what motivated the killer. In an attempt to find the answer to this question, you will find that this story has a second bottom.
Call of the Moon will require Skyrim players to rely less on quest markers and more on their own moral compass. And although the mission will eventually come down to one solution, choosing the “right” option (if there is one at all) is incredibly difficult.
As a reward for completing the quest, you can get one of two unique items, each of which can significantly affect the further gameplay.
12. Death of an Empire - Skyrim

The missions of the Dark Brotherhood from Skyrim are hard to compare with the much more creative missions from Oblivion. In the end, the line from Oblivion is one of the best that Bethesda has created. However, some Dark Brotherhood quests from Skyrim deserve a mention on our list.
And it’s worth starting with the Death of an Empire quest, as well as a preparatory task, during which we need to infiltrate the emperor’s castle, pretending to be his cook. Next up is one of the funniest poisoning scenes ever, featuring a cook ready to add even the most ridiculous ingredients to a dish.
But as fun as it is to watch the poisoned dish being prepared, the best part of the mission is its final twist, which reveals the true nature of the Dark Brotherhood.
11. Where Spirits Dwell - Oblivion

In Oblivion, you can buy several houses at once, but the prices for them are clearly too high. That's why most players will purchase the Benirus Mansion, which sells for as little as 5,000 gold, with no questions asked. But bargaining for a new home will result in you having to live under the same roof with hostile ghosts.
Next, you will try to clear the house of ghosts and a complex rite of exorcism, during which you will find out where these ghosts came from. It will soon become clear that the Benirus mansion has a rather creepy and long history, from which the blood naturally freezes in the veins.
Here is a gorgeous ghost story, perfectly woven into the world of Oblivion, which turned out to be both funny and scary.
10. Silent Pilgrimage - Morrowind

Two high-ranking representatives of the Canton Temple in Vivec want you to show your wisdom and patience by making a pilgrimage to the Sanctus Temple. And before that, they force you to take a vow of silence. If you talk to anyone during your pilgrimage - including asking for fast travel, talking to merchants, or any of the characters you meet - the mission will fail.
And although the idea of the quest can be destroyed using numerous in-game exploits, those who choose to play the "Silent Pilgrimage" as intended by the developers will be able to appreciate the genius of the quest's design. By depriving you of the ability to rely on the help of others - which is an important part of moving through the world of Morrowind - Bethesda forces players to use completely unfamiliar skills to complete a simple task.
Thus, traveling in complete silence is as rewarding as slaying a dragon or a Daedric lord.
9. Shadow over Hackdirt - Oblivion

A young Argonian named Dar-Ma has gone missing. She was last seen delivering a package to the small town of Hackdirt. Having reached the city, we find that it is on the verge of ruin, and it is inhabited by very unfriendly inhabitants. After talking to some of them, we begin to doubt that Dar-Ma even showed up here.
Even though the quest follows the classic structure of H.F. Lovecraft, which the developers pay tribute to, it contains enough twists that even those who know the story by heart cannot predict, and therefore the intrigue remains until the last moment.
This is arguably the best horror quest in Elder Scrolls history.
8. Rogue Conspiracy - Skyrim

A woman is brutally attacked on the streets of Markarth. A little later, it turns out that members of the Outcast faction were behind the assassination attempt. No one is particularly surprised by this incident, but a mysterious man at the scene of the attack claims that this is all part of a larger conspiracy.
Investigative quests in the Elder Scrolls series are always particularly exciting, and this mission in particular is good because it draws the player into action with a simple incident, which turns out to be just a thread that really leads to a massive conspiracy.
A normal attack as a result sets off a chain of events that will forever change not only Markarth, but the entire world presented in Skyrim.
7. Corprus Healing - Morrowind
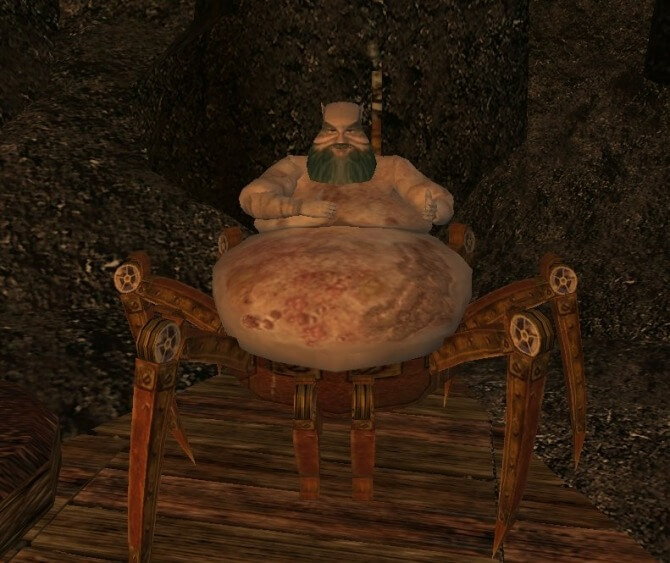
In many parts of the Elder Scrolls, we are faced with terrible diseases that are very difficult to cure, but none of the quests to find a cure compares to what happens after we become infected with corprus in Morrowind.
Corprus is an incredibly deadly disease, considered incurable, that all Morrowind players will have to deal with during the main quest. After the announcement of the diagnosis, you learn about an ancient wizard who, according to rumors, managed to find a cure for the disease. Unfortunately, getting to it is quite difficult. And even if you manage to find it, then an even more difficult task awaits you.
Interestingly, The Corprus Cure is the only Elder Scrolls quest that allows you to interact with a living Dwemer. However, the main advantages of the mission are dungeons full of details, mini-puzzles and the impact of the quest events on the subsequent passage.
6. Paranoia - Oblivion

On the streets of Skingrad, you meet an elf named Glarthir, who asks you to return to the same place at midnight. If you fulfill his request, you will find Glarthir's monologue, who is sure that he is at the center of a major conspiracy. He asks you to watch the suspects on his personal list. And although Glarthir looks like a madman at first, you will soon realize that everything is not so simple.
"Paranoia" can be called a kind of social experiment sewn into Oblivion. This quest generously rewards gold to those players who decide to use Glarthir's doubts to their advantage, up to a certain time, without showing them the consequences of their choices. However, players will have to decide how far they are willing to go for the maximum benefit.
Unfortunately, even the one who ends up making the right decision ends up realizing how terrible his actions were...
5. Ghosts of Vitharn - Shivering Isles

The inhabitants of New Sheoth speak with horror of a cursed settlement called Vitharn. Arriving in this village, we find that most of its inhabitants died due to the attack. Sheogorath condemned them to eternal torment in the form of ghosts due to the fact that they could not protect their settlement, and now the spirits of Vitharn ask you for help.
This quest could well become a separate game. The complexity of the tasks and the variety of problem solving options lead us to a stunning series of puzzles that are inextricably linked to the city's tragic backstory.
"Ghosts of Vitharn" is a prime example of how much a good script affects the final quality of an RPG.
4. Trap in action - Shivering Isles

A dungeon master named Kiliban Nirandil, who has a bad habit of laughing out loud, is worried that three adventurers are in his dungeon. Nirandil asks you to help decide their fate and temporarily take over the role of master of the dungeon.
This quest is an inventive nod to the Dungeons and Dragons era of tabletop RPGs, only it uses all the mechanics of the Elder Scrolls. While there aren't many options for you to choose from in each of the presented rooms, it's extremely interesting to see the consequences of your decisions, which are reflected in the physical and mental state of the adventurers.
But whatever your decisions, you won't forget this creative torture maze. This is one of those missions whose saves can be launched at any time and replayed situations again.
3. An unforgettable night - Skyrim

A guy named Sam invites you to drink as much alcohol as possible at a local pub. After a few glasses, he declares you the winner and adds that the fun can continue "where the wine flows like water." And after a while you lose consciousness and wake up in the temple, not understanding at all how you ended up in it. What happened and where is Sam?
This obvious reference to The Hangover is, ironically, the most memorable quest in Skyrim. It is impossible to suppress a smile, gradually restoring the picture of the events of last night and being horrified by their wild adventures. And by the time you find out what happened to Sam, you will probably already be laughing out loud.
2. Daring robbery - Oblivion

For your latest mission in the Thieves Guild, the mysterious Gray Fox has prepared a task that seems impossible. He asks you to break into the Imperial Palace and steal one of the Elder Scrolls.
This quest is the culmination of a series of excellent Thieves Guild missions, during which we collected a number of mystical items. All of these items will come in handy for the final quest, during which you'll have to use the utmost care and stealth to get into the most secure room in Tamriel.
Not only does this quest show us just how awesome Thief could be under the direction of the Elder Scrolls writers, it also ends on the high note that the Guild storyline deserves.
1. Detective - Oblivion

The Dark Brotherhood has given you a quest to visit the prestigious Summitmist mansion in Skingrad. There you will be met by an accomplice pretending to be a porter who will inform you that five members of the Brotherhood have also arrived at the reception. One of the guests is a killer... and that killer is you. If you manage to kill all the guests without arousing any suspicion, you will receive the most solid skill bonus in the entire game.
However, even without this incentive, the mission is incredibly interesting to complete. The open structure of the quest allows you to endlessly experiment with ways to kill guests, over and over again diverting suspicion from yourself. You can kill them one at a time, like in some slasher movie, you can set up an accident, or you can find out how they feel about each other and make them do all the dirty work for you by playing on their fears and hatred. The main thing is to eliminate guests in time who begin to look askance at you.
It is impossible not to note the classic setting for such stories (after the start of the quest, the weather automatically deteriorates, and it rains outside the window), but this quest is notable for the huge number of options for action, which makes it the best in the Elder Scrolls series. The perfect mission to play your chosen role.